Hello my crafty peeps! I’m happy to be here again this month as part of the Fun & Crafty blog hop. This month’s theme is Fall or Halloween! It seems like only yesterday we were in the middle of summer. This past Friday was the official first day of Fall, but here in Seattle, we don’t seem to have gotten the memo (it’s been sunny and warm for the past hew weeks). I went shopping at Trader Joe’s bright and early Saturday morning and was amazed. It was like the entire place had been hosed down with pumpkin spice … overnight. Pumpkin spice cake, cookies, pasta, fudge, caramel corn, cereal … you name it and TJ’s probably has it … even the dogs were included with pumpkin spice dog biscuits! I love fall, and pumpkin spice, so a few things (the caramel corn was delicious) may have made their way into my basket!

This month I decided to focus on one of my favorite suites in the new Holiday catalog, The Painted Harvest. It includes a wonderful layering stamp set with these dreamy floral and leaf images, some “thankful” sentiments, and best of all a coordinating leaf punch. There is also a beautiful pack of 12 x 12 DSP and some wooden elements. This is a very versatile suite of products with color combinations for fall, the holidays, and spring.
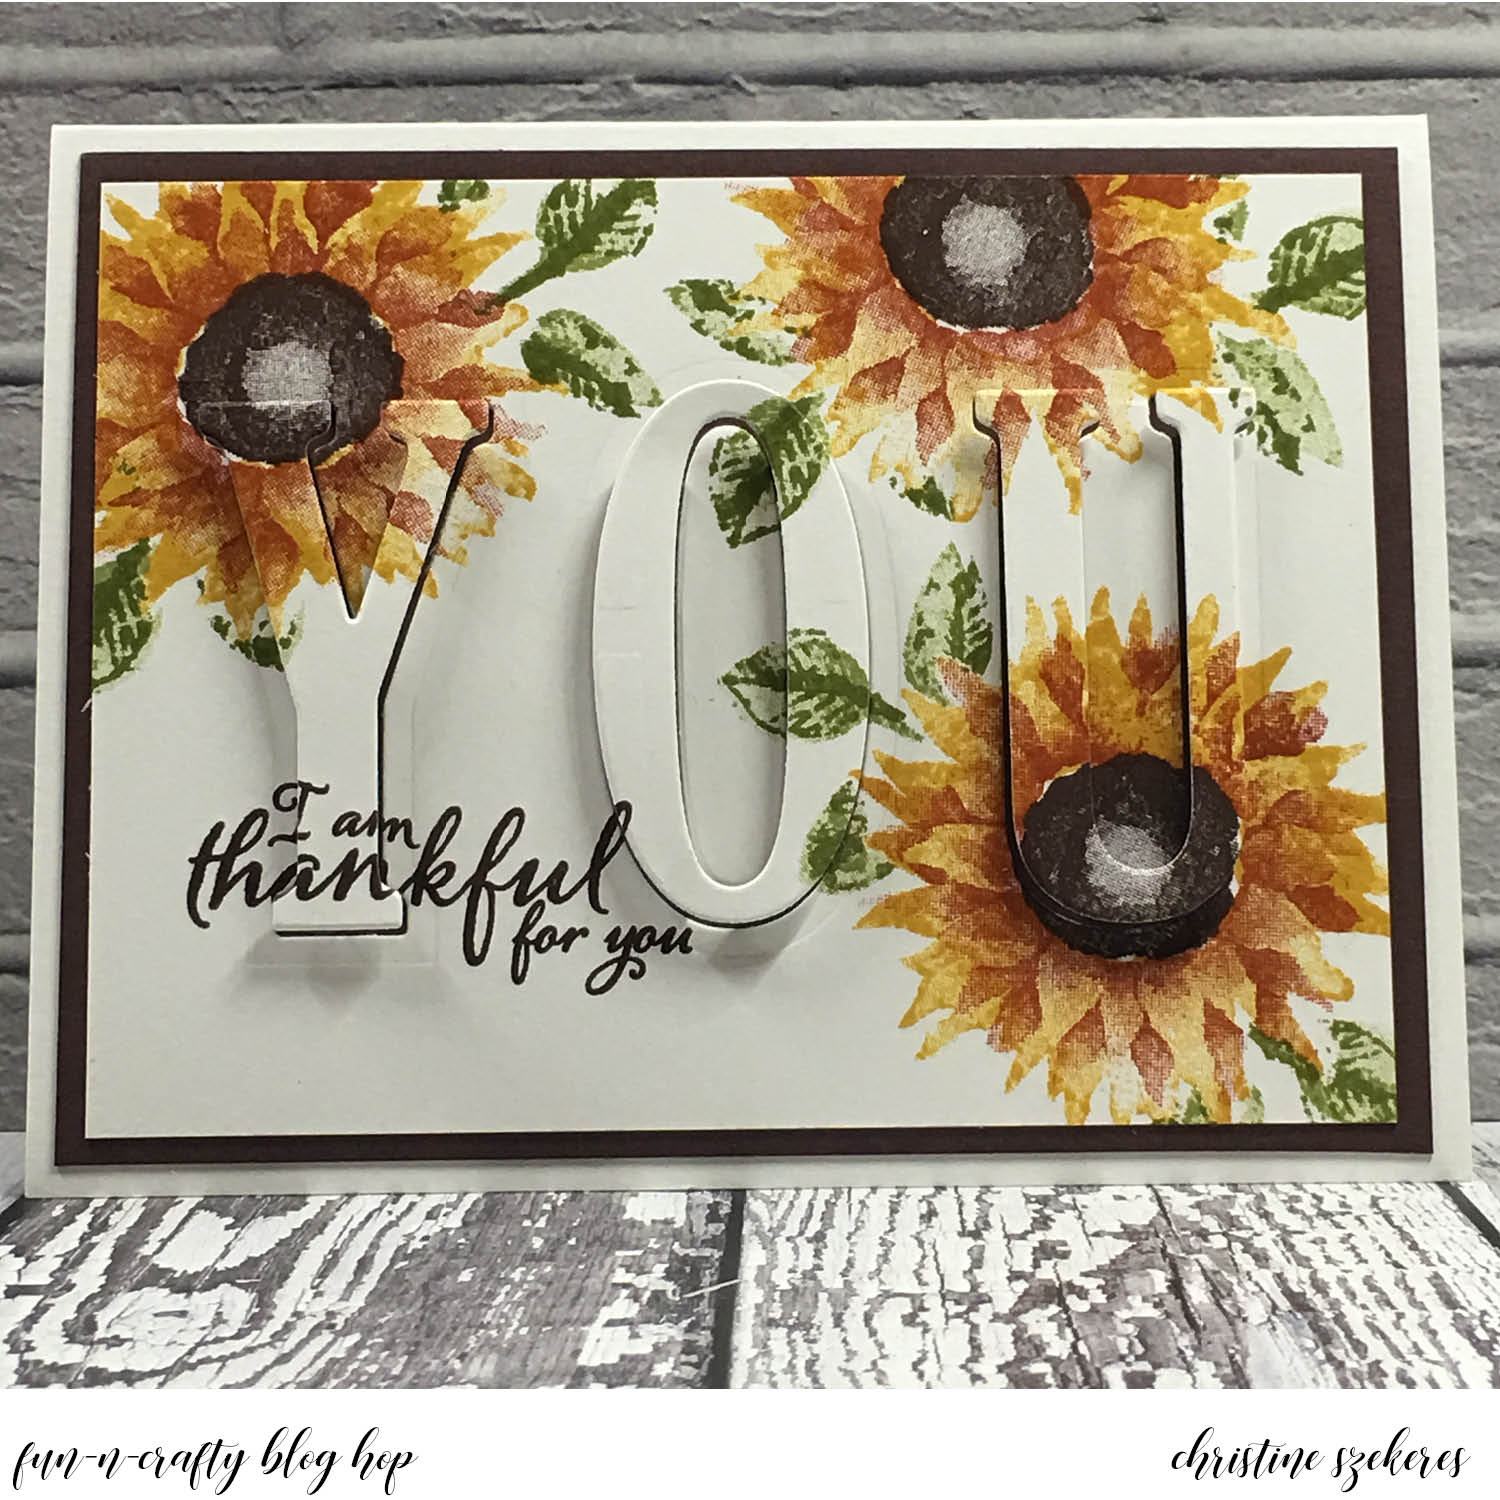
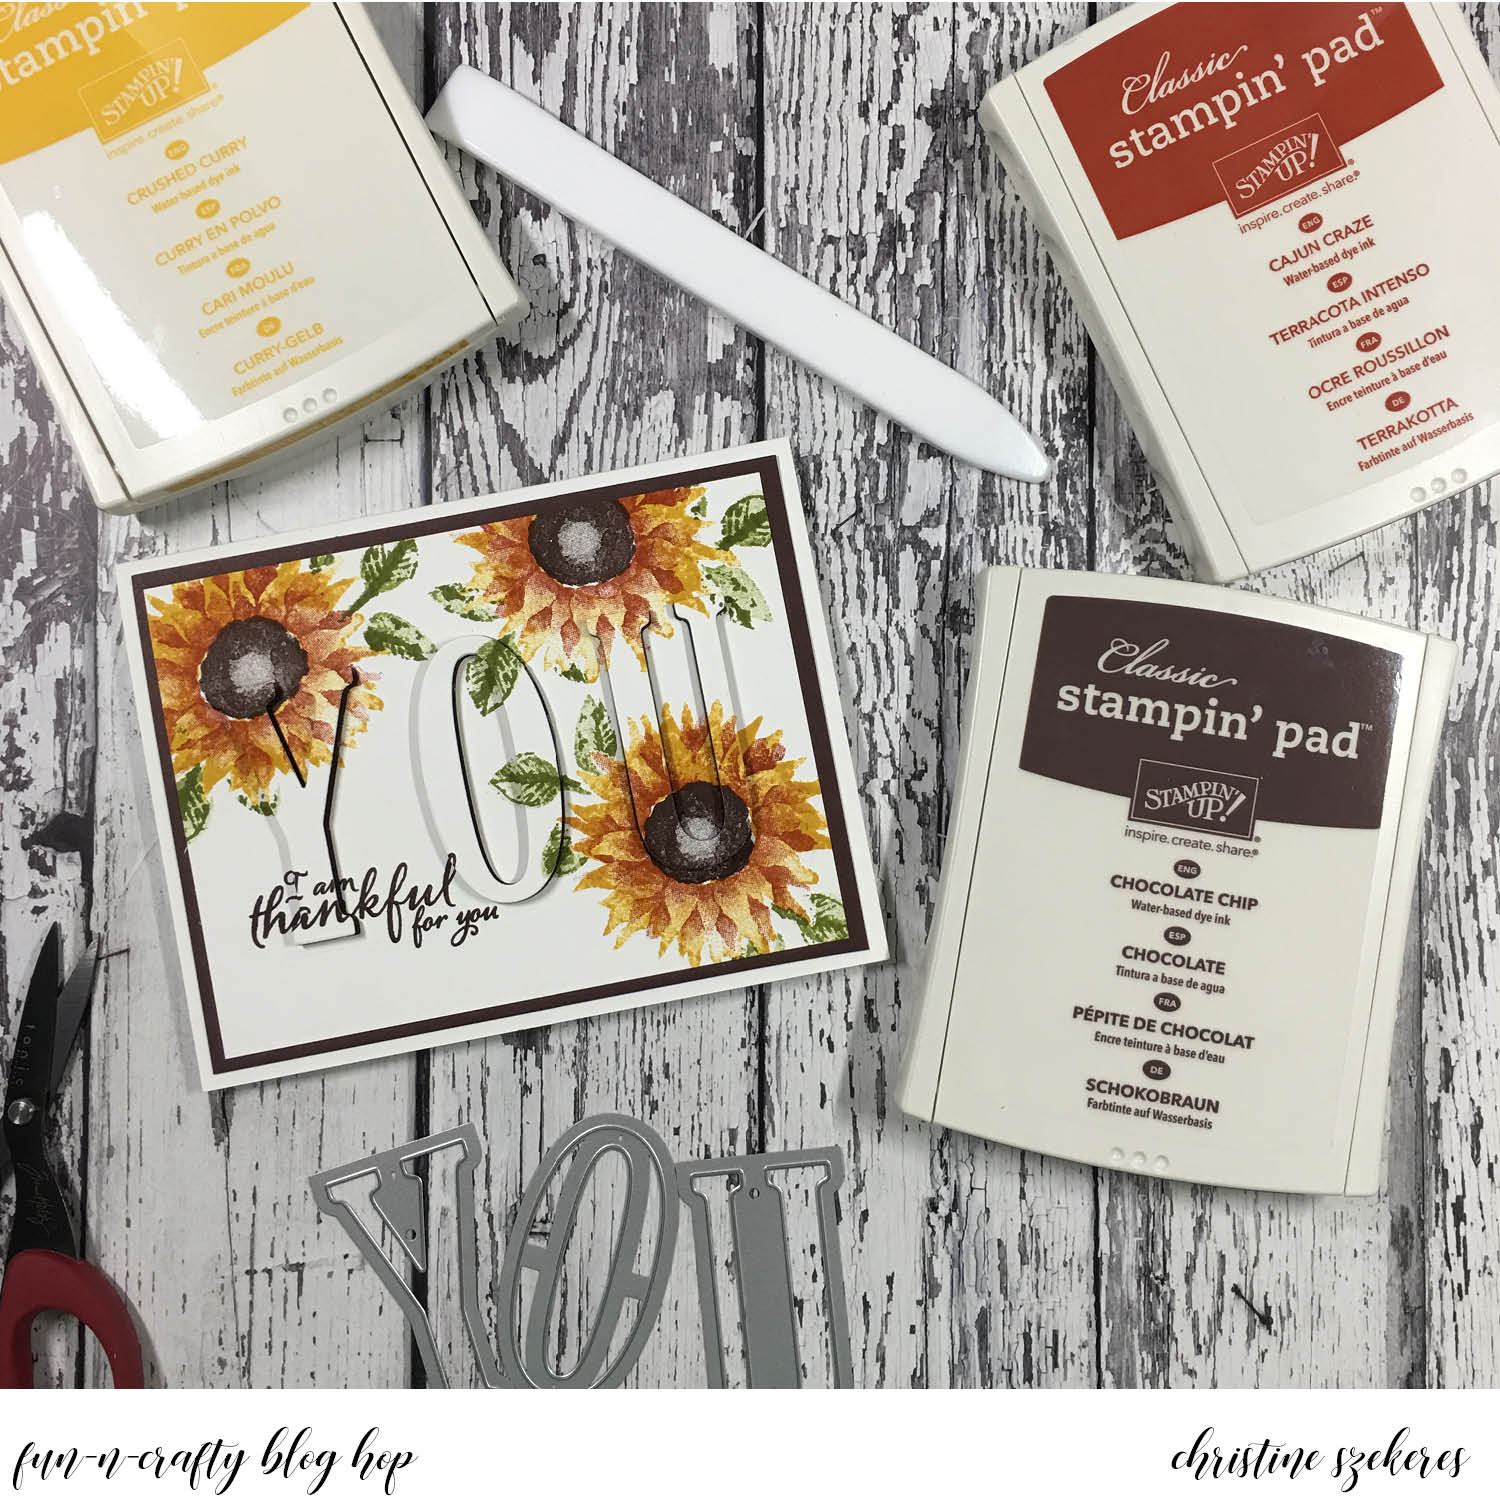
I decided to combine this suite with a cool technique, eclipse. I love this technique with the Stampin’ Up! large letters framelits. I began with an A2 Whisper White card base, a 5.25″ x 4″ Chocolate Chip mat, and a 5″ x 3.75″ thick Whisper White panel for stamping. This set has that “artistic” look (the base stamps don’t stamp solid) and sometimes I think, “Oh, no, it’s going to look terrible!”, but it never does! HINT: I use the Stampin’ Pierce Mat to make sure I get good coverage from photopolymer stamps.
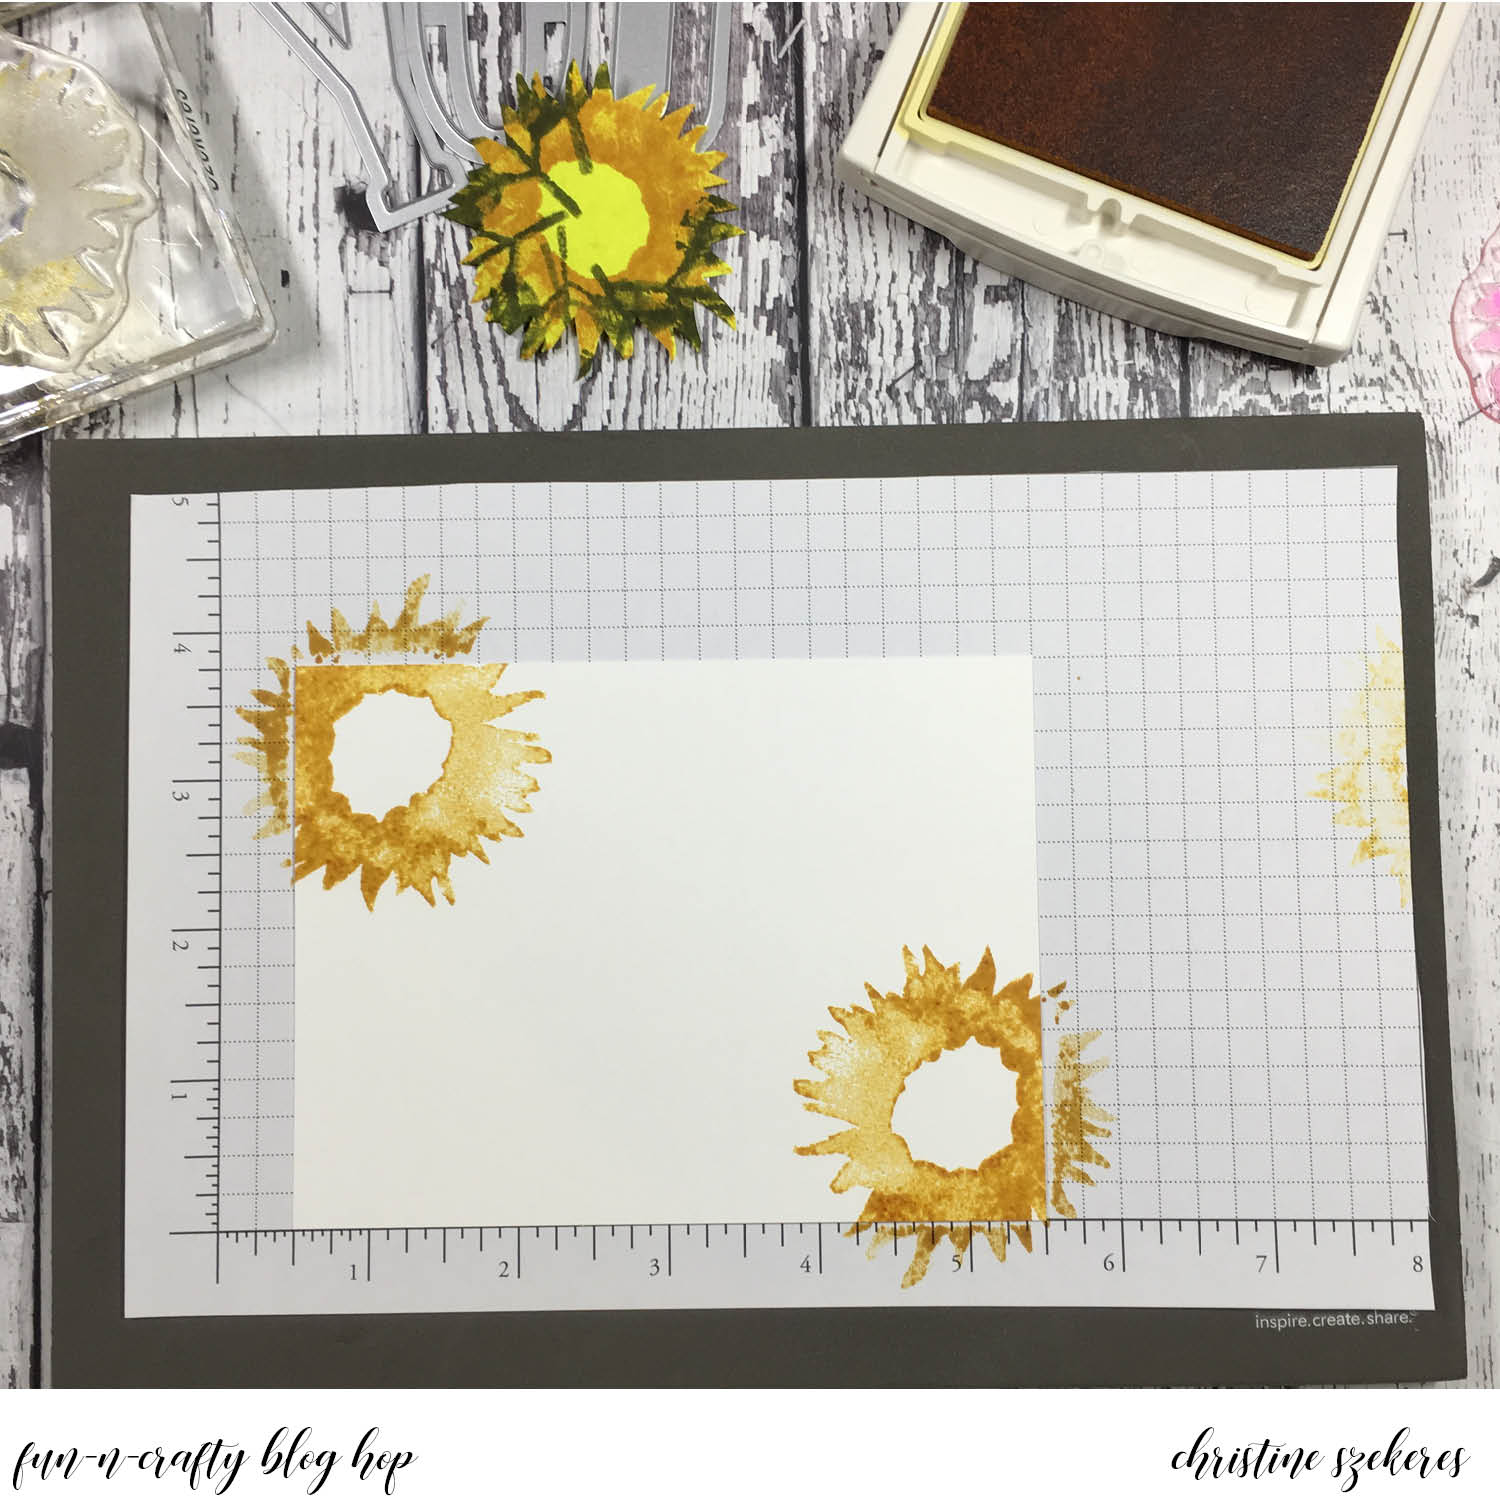
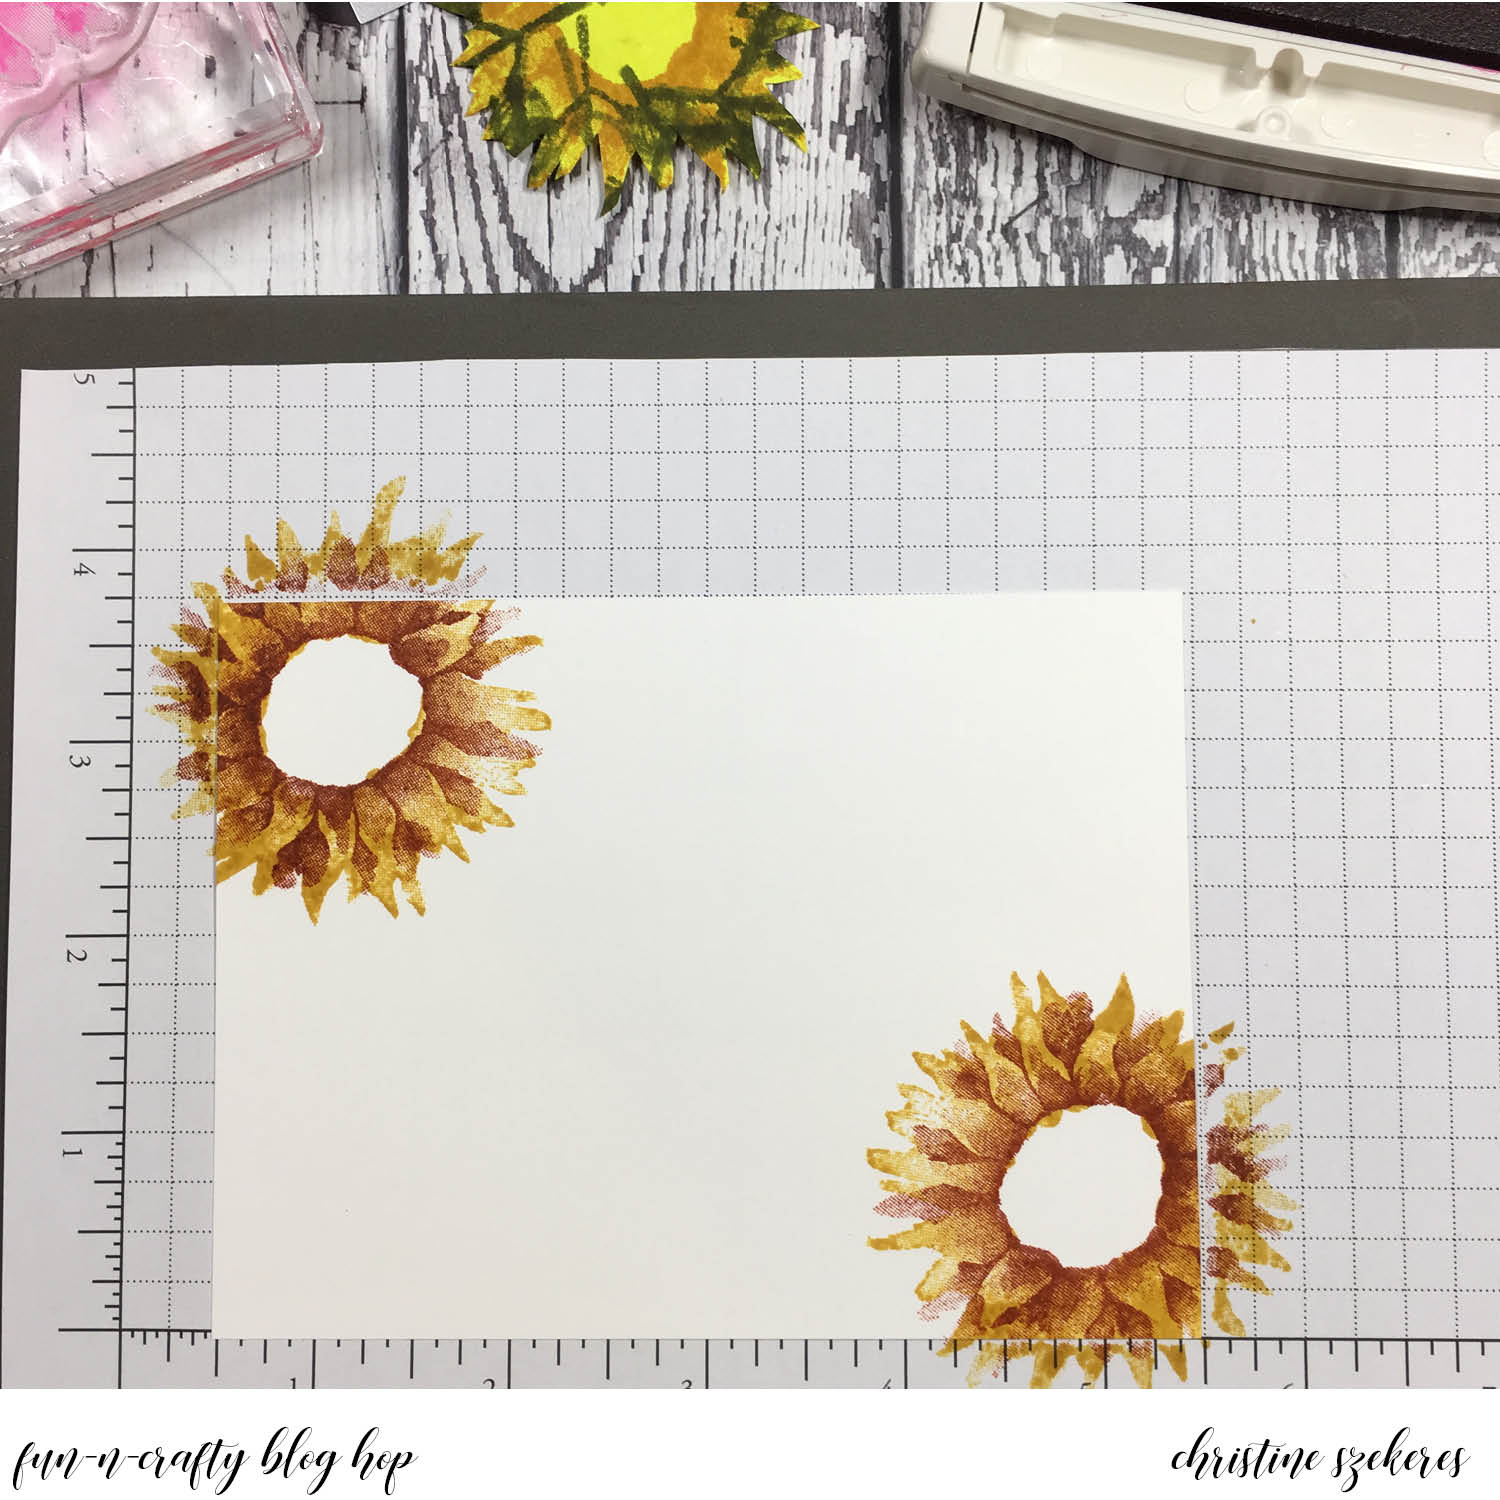
Beginning with the base flower, I stamped three on the panel in Crushed Curry. Next, using the detail layering image, I stamped over the large flower in Cajun Craze ink. I also stamped a flower onto a post-it note and fussy cut it to use as a mask for stamping the leaves, which I stamped in Pear Pizzazz for the base and Old Olive for the detail. I also stamped the flower middle using Chocolate Chip ink. Lastly, I stamped the sentiment, “I am thankful for you” in Chocolate Chip.
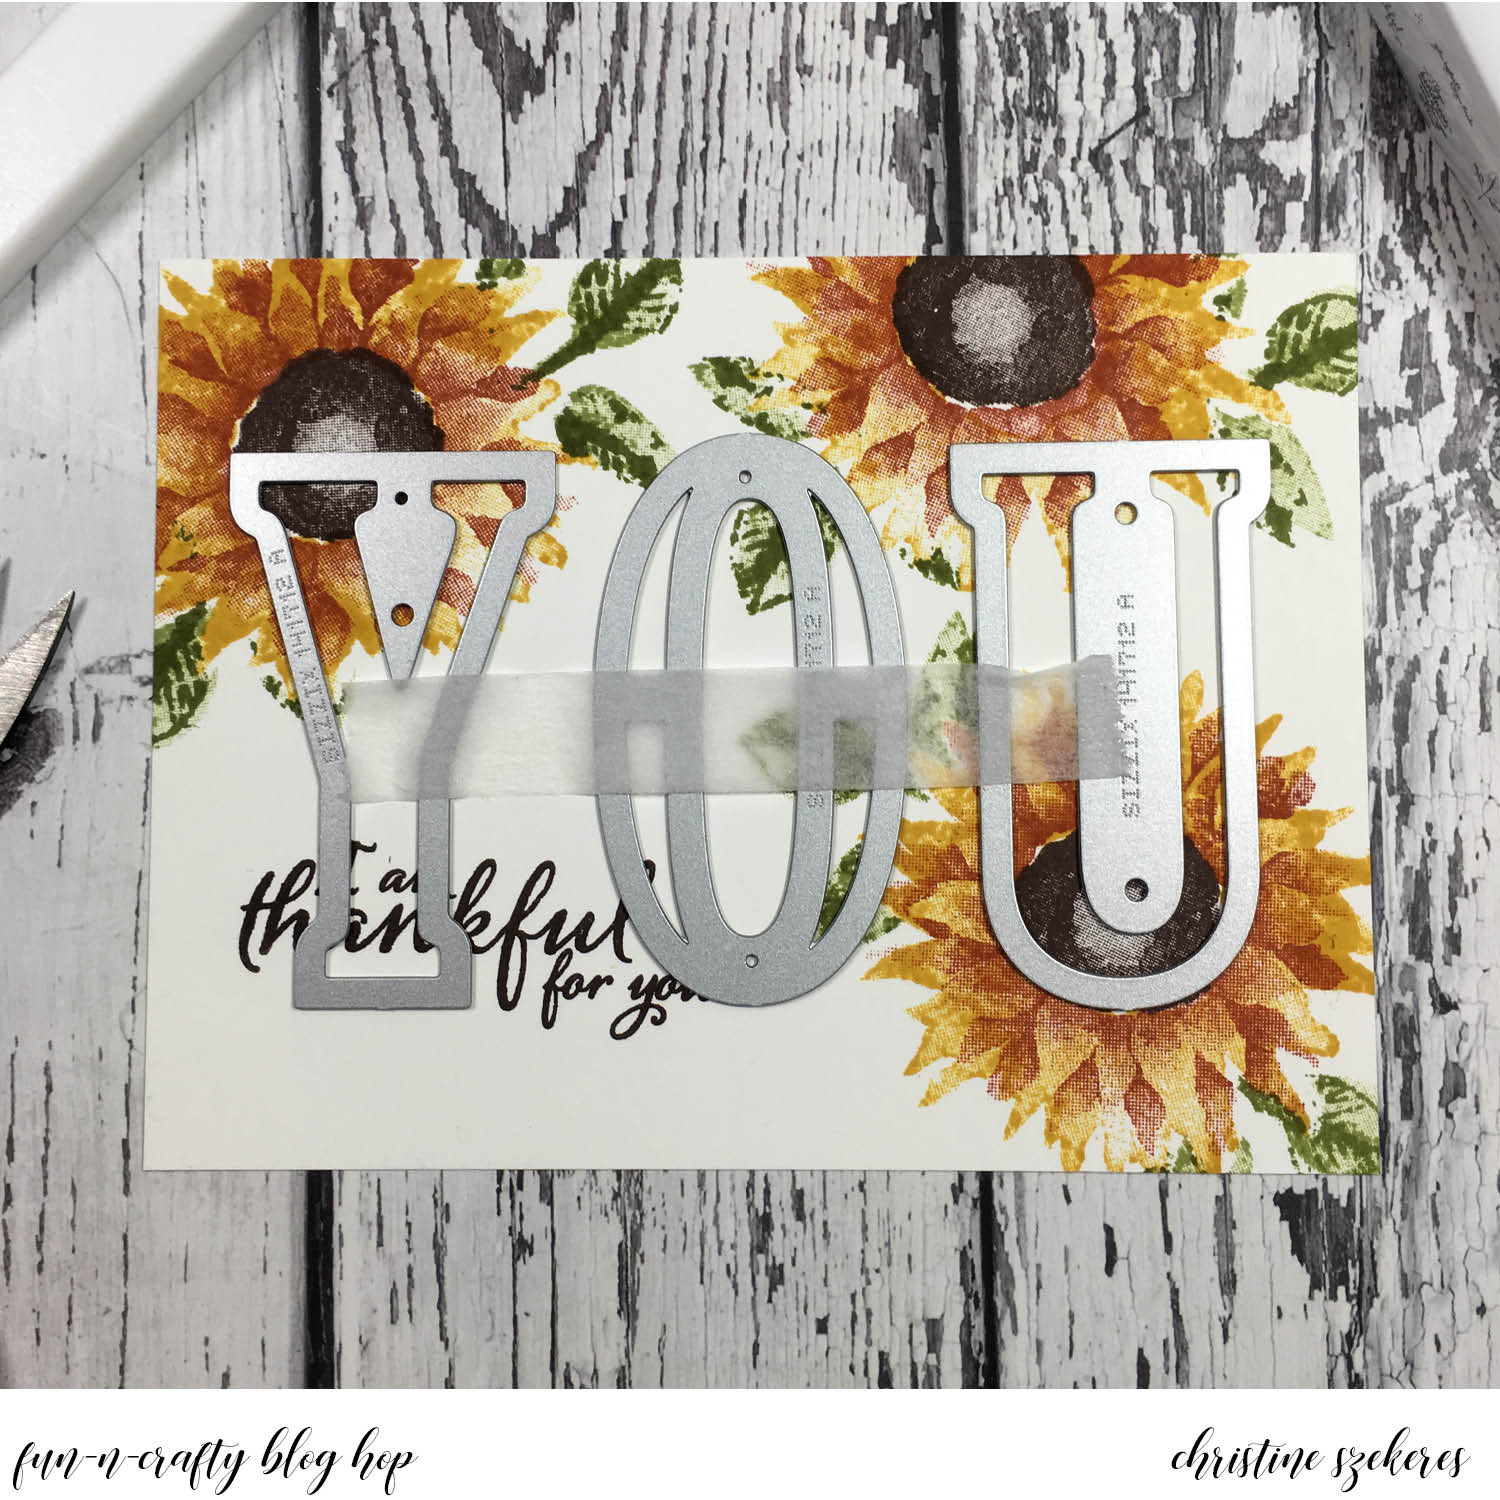
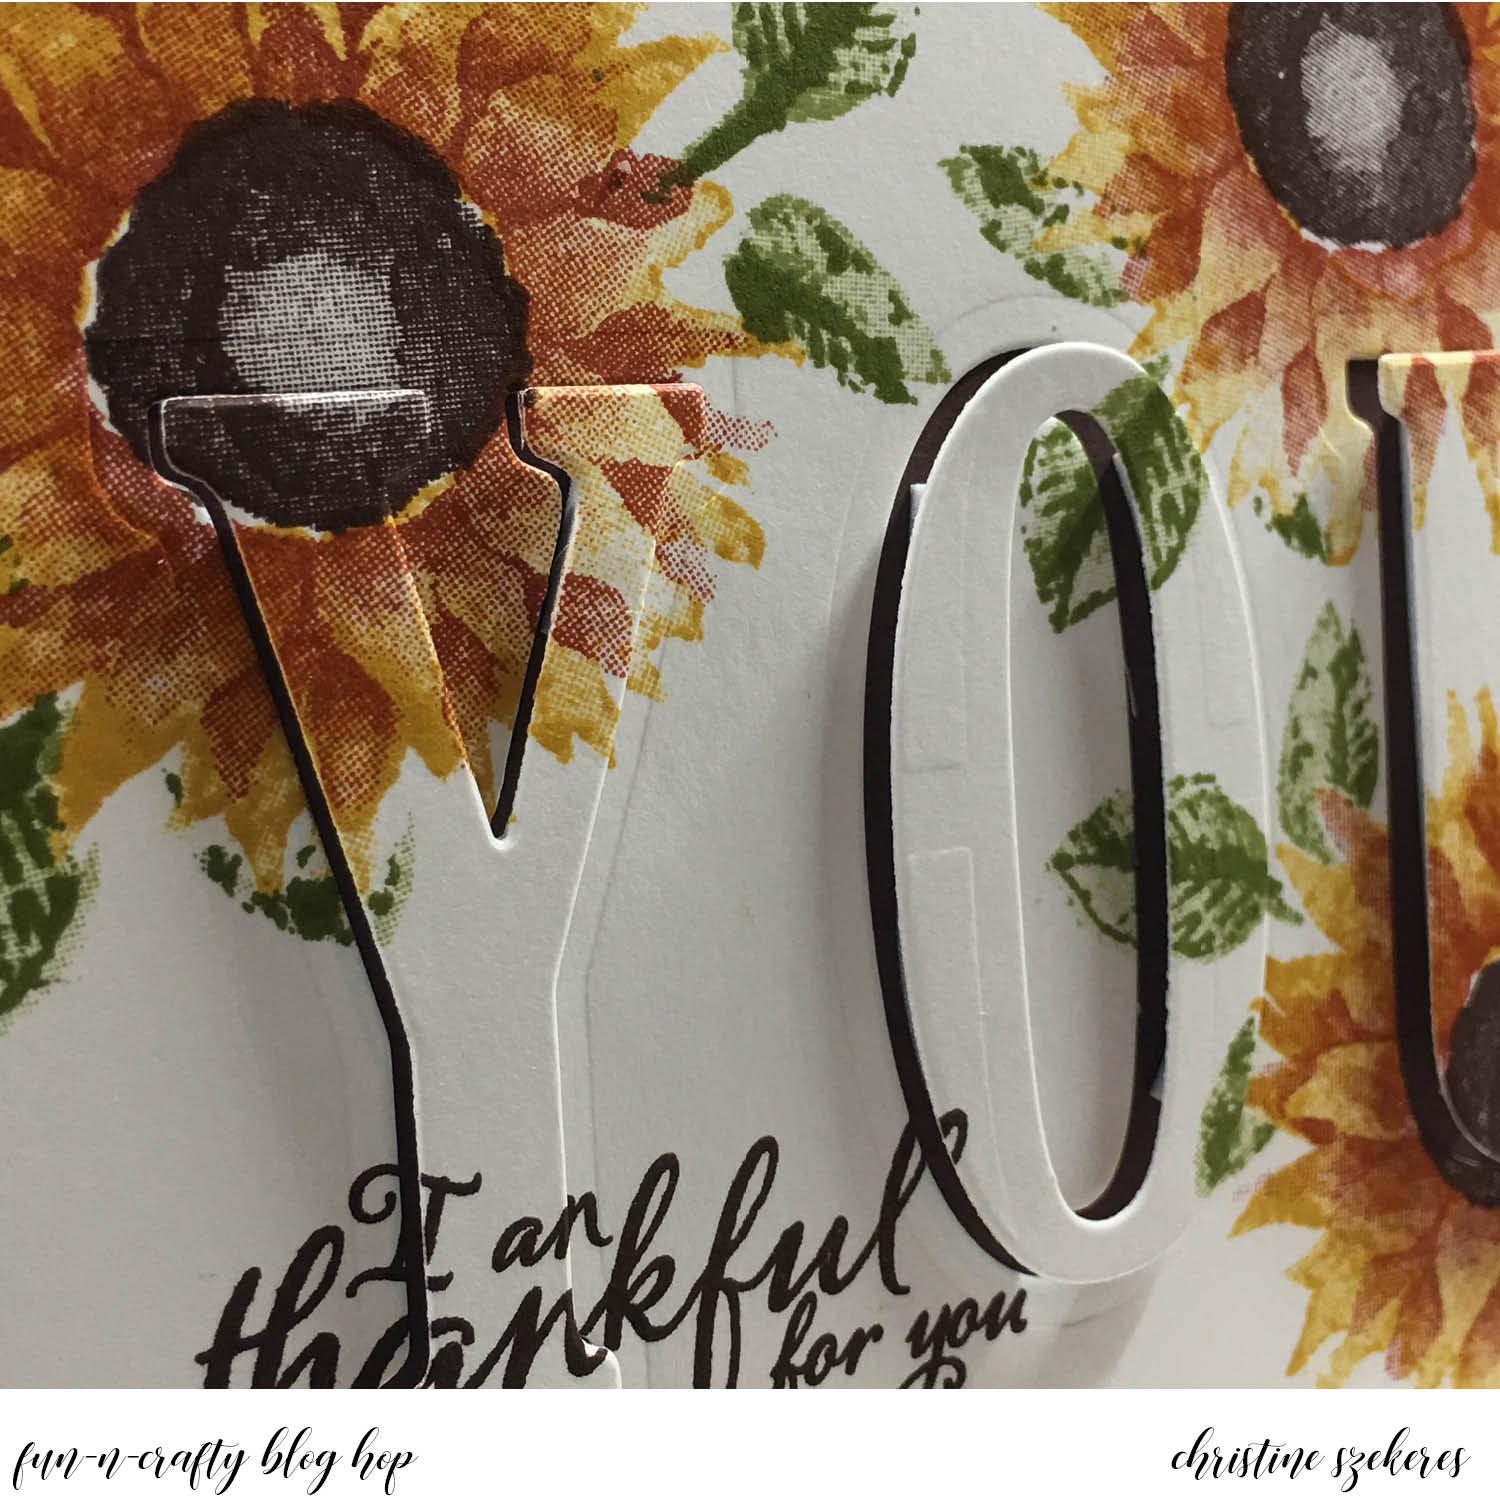
Now, it’s time to create the eclipse. Using the Y – O – U letters, I centered them on the panel and secured them in place using post-it note tape. I ran this through my BigShot and then popped them out. HINT: Make sure to keep any letter centers (like in the O) to adhere to the matte panel. To make sure you get it centered, first put the letter in its place, put adhesive on the back of the center piece, and put it down. Then you can lift out the letter. Using the foam adhesive strips, pop up each letter inside its space on the card.
There is a ton of inspiration throughout this hop. Since you started here, I encourage you to grab a favorite beverage, perhaps a pumpkin spice latte, and visit the other talented team members listed below to leave them some blog love! Next up is the amazing Merit. Until next time, remember, creativity and imperfection live together in all we do. “Grace is the face love wears when it meets imperfection.”
~xoxo


- Tobe — The Craft Sea
- Christine — Artful Musings (you are here)
- Merit — MB Squared
- Jennifer — NW Stamper
- Susan — Stampin by the SF Bay
Supplies Used:
Stamps & Dies: Painted Harvest (144783) & Large Letters Framelits (141712)
Card Stock: Whisper White (100730) & Chocolate Chip (102128)
Ink: Crushed Curry, Cajun Craze, Chocolate Chip, Pear Pizzazz, & Old Olive
Foam Adhesive Strips (141825)