Category: Christmas Inspiration

Stampin’ Up Holiday Catalog

Hello, crafty peeps! I hope you are pouring over the newly released Stampin’ Up! holiday catalog, picking out all your favorite items. As a demonstrator I had this opportunity last month and, though it felt like a Herculean feat, I decided to order just a few things.

I know I’ll place another order soon for a few more of the things I LOVED — truly there is so much to love in the catalog. In the meantime, thought it might be fun to share my Top 10 favorite items with you as well as a couple of the things I’ve made using some of these new goodies.

Beanie’s Top Ten Holiday Catalog Favorites

  1. Spooky Night DSP (p 53)
  2. Spooky Cat Stamps (p 53)
  3. Cat Punch (p 53)
  4. Merry Little Christmas DSP (p 12)
  5. Merry Little Labels (p 12)
  6. Everyday Label Punch (p 12)
  7. Year of Cheer DSP (p 37)
  8. Year of Cheer Washi Tape (p 37)
  9. Mini Pizza Boxes (p 44)
  10. Mini Tinsel Trim (p 21) & Quilt Top Embossing Folder (p 5)

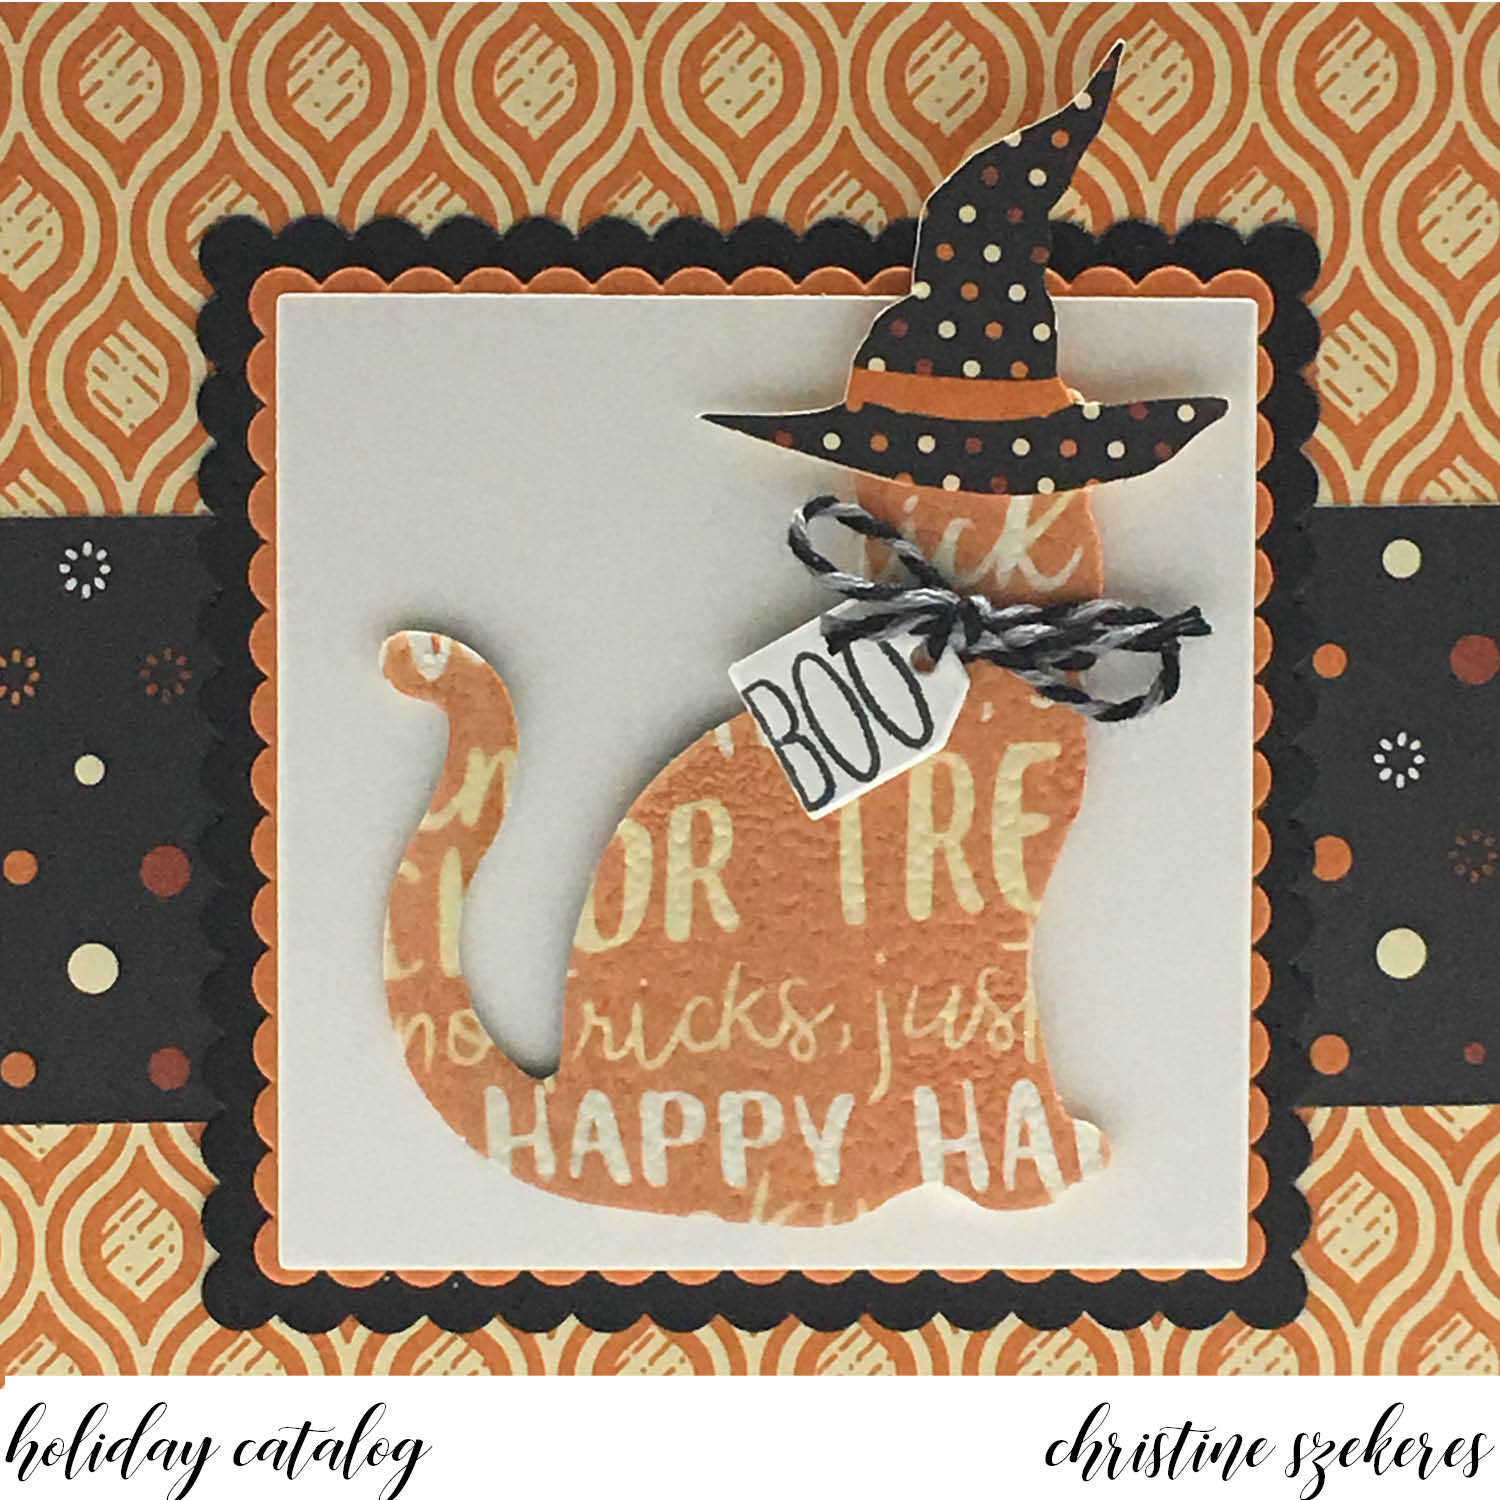
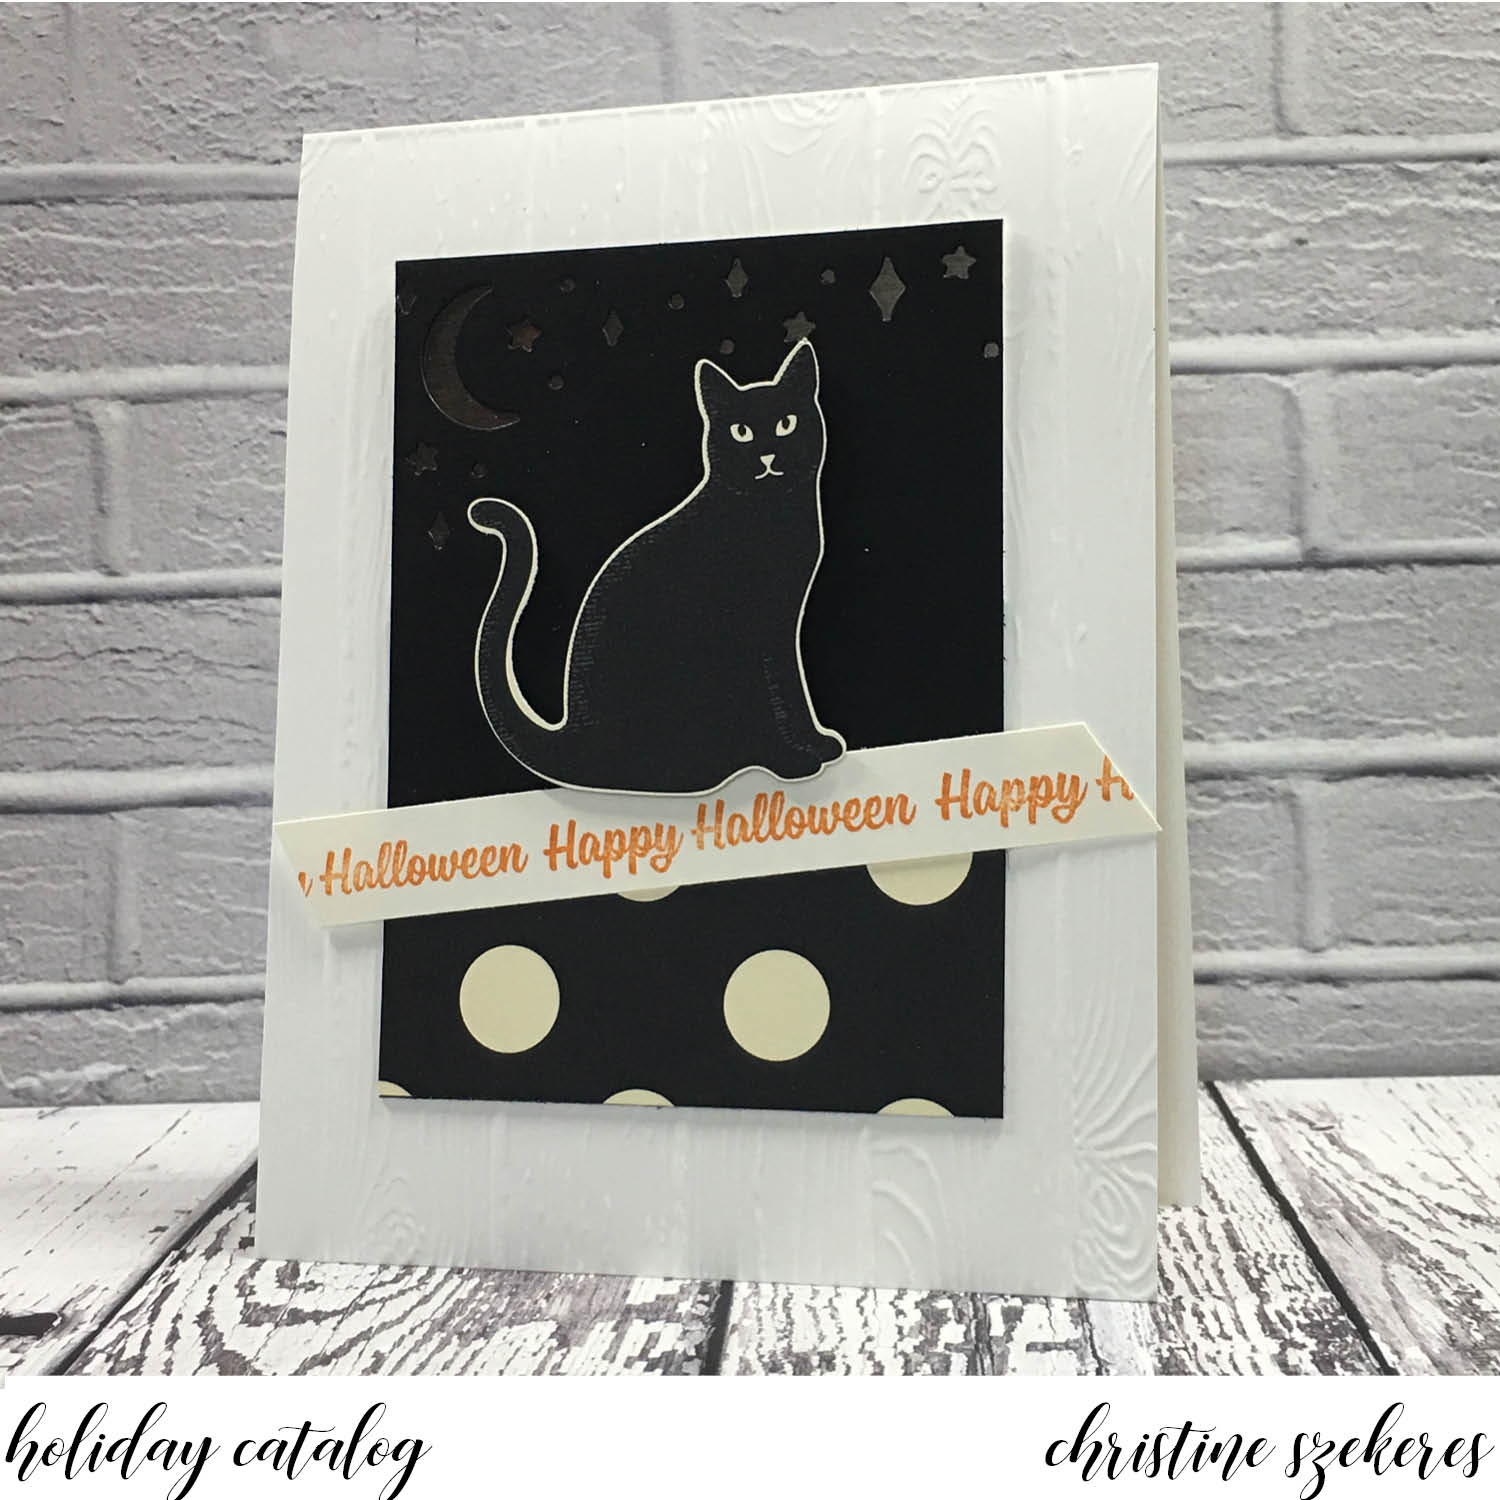
The first card I want to share is called “Spooky Kitty Surprise” and uses the new Cat Punch, Spooky Night DSP, and the Spooky Cat stamps. Recently Stampin’ Up! has begun coordinating some of their dies and punches with images from designer series papers. I love this. There are a few different punches and thinlet dies in the holiday catalog that have this ability, Spooky Night DSP being one. The cat image on the DSP is sized perfectly to punch out using the new cat punch. For my card I decided to punch out the cat from the words DSP paper.


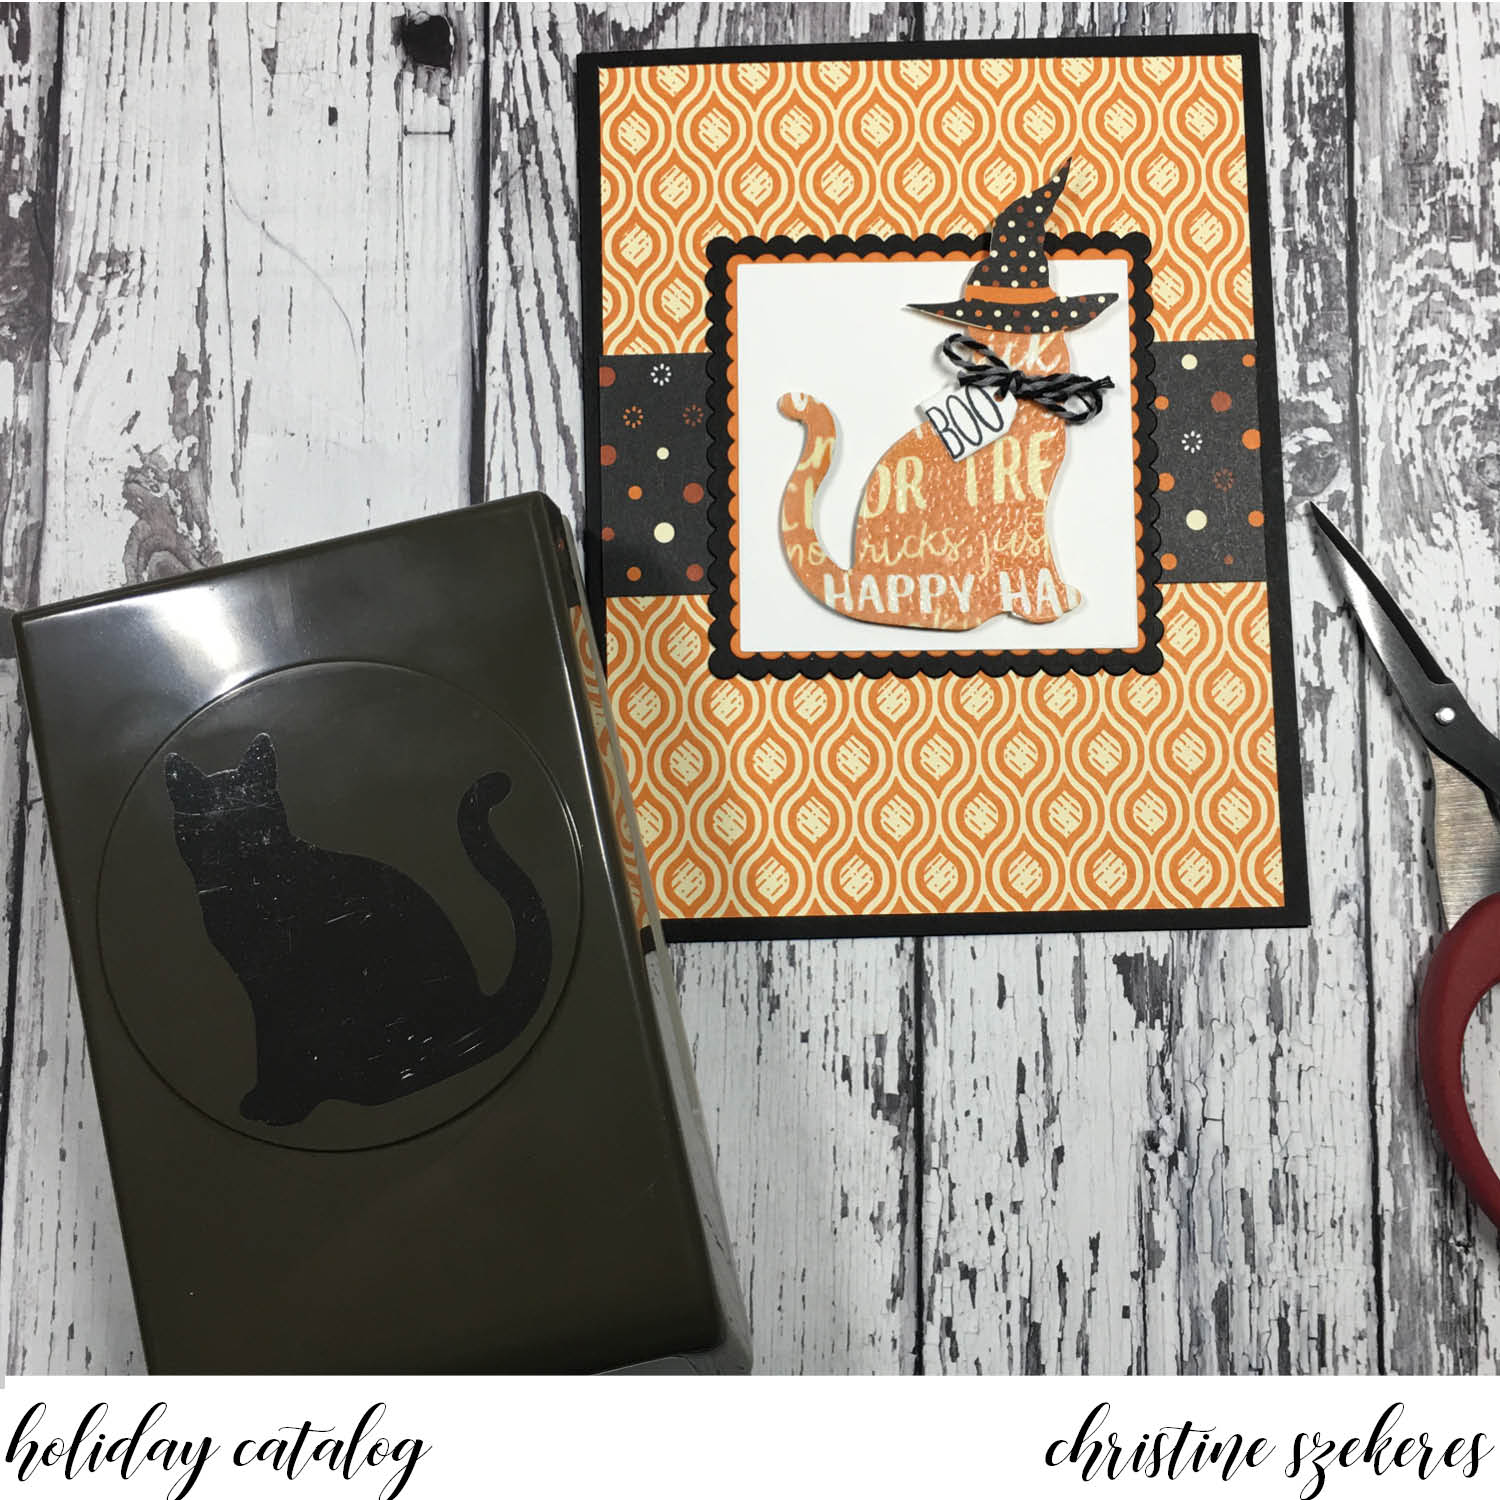
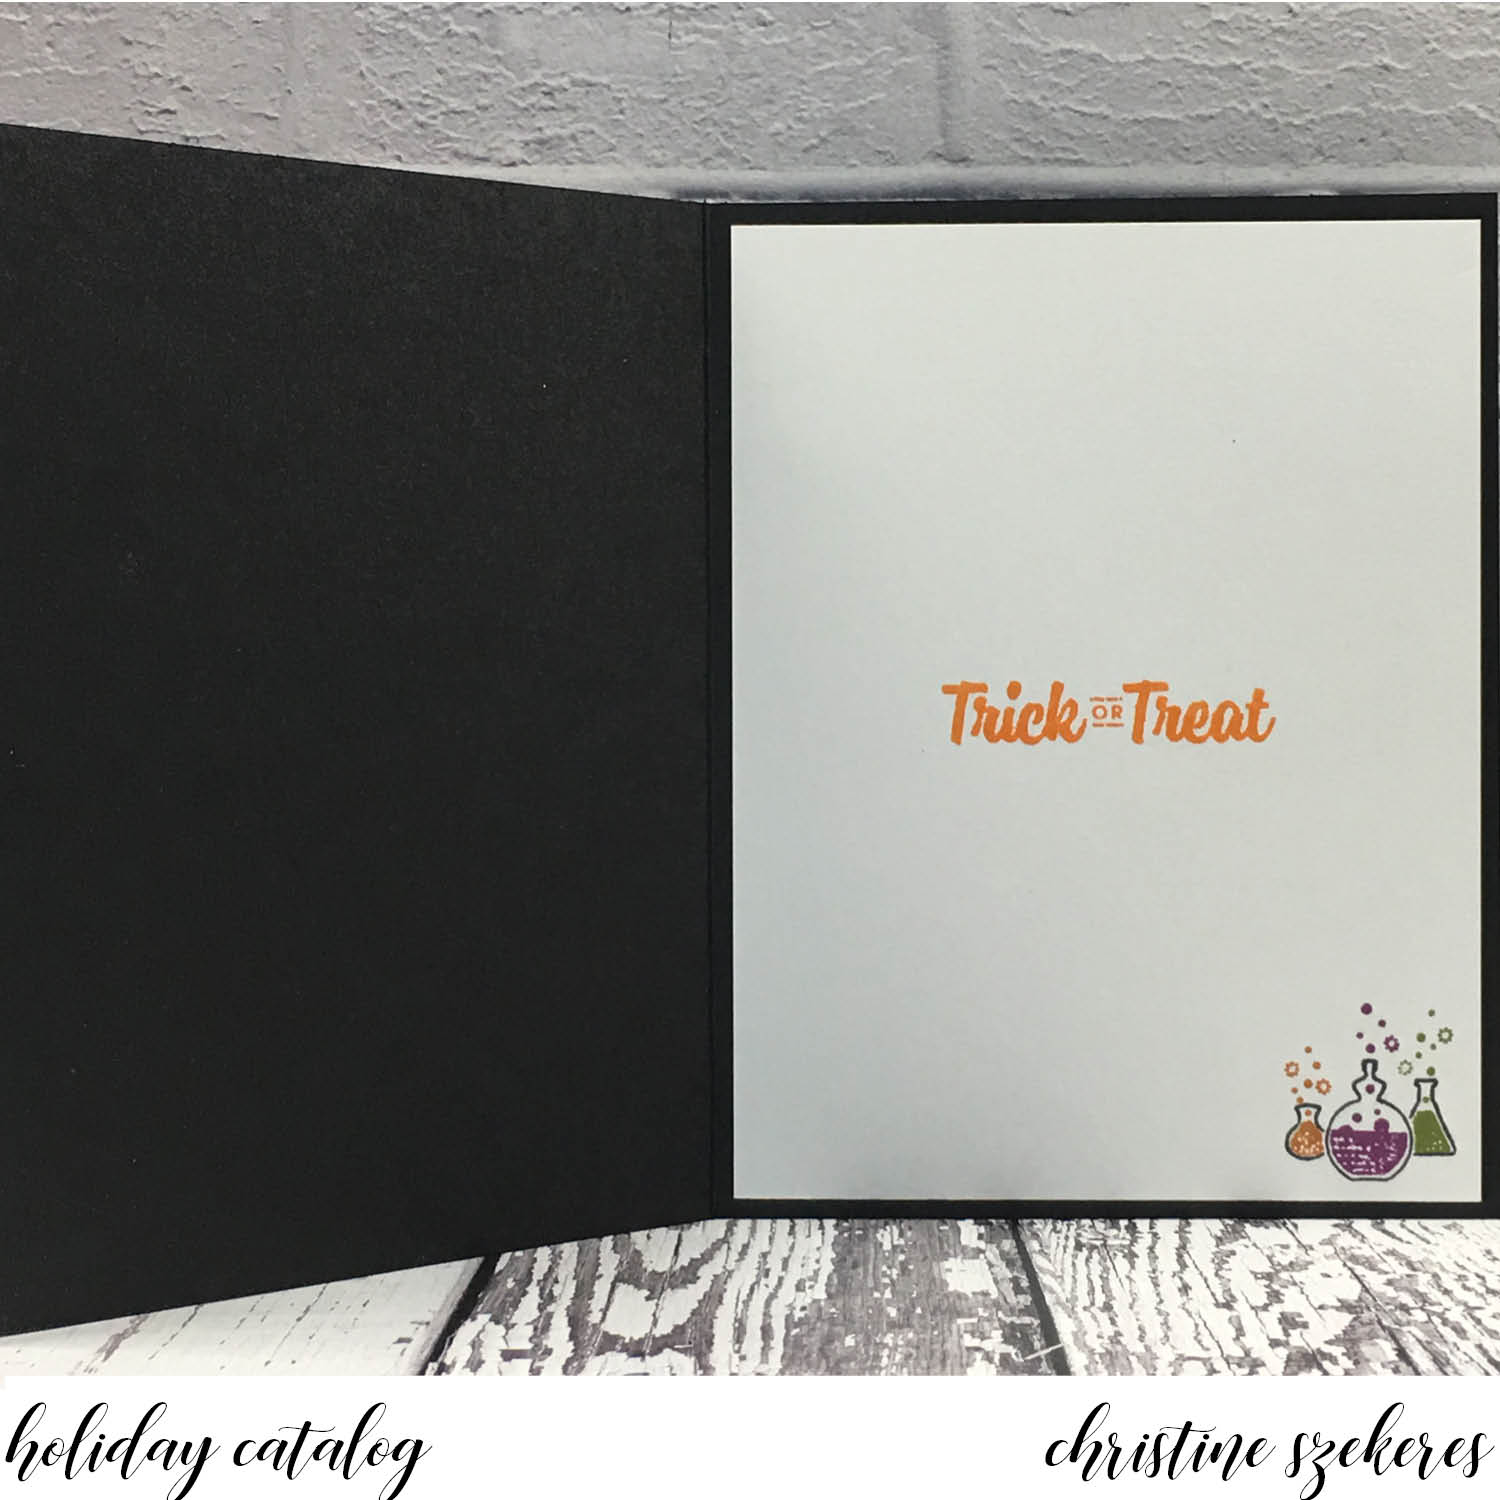
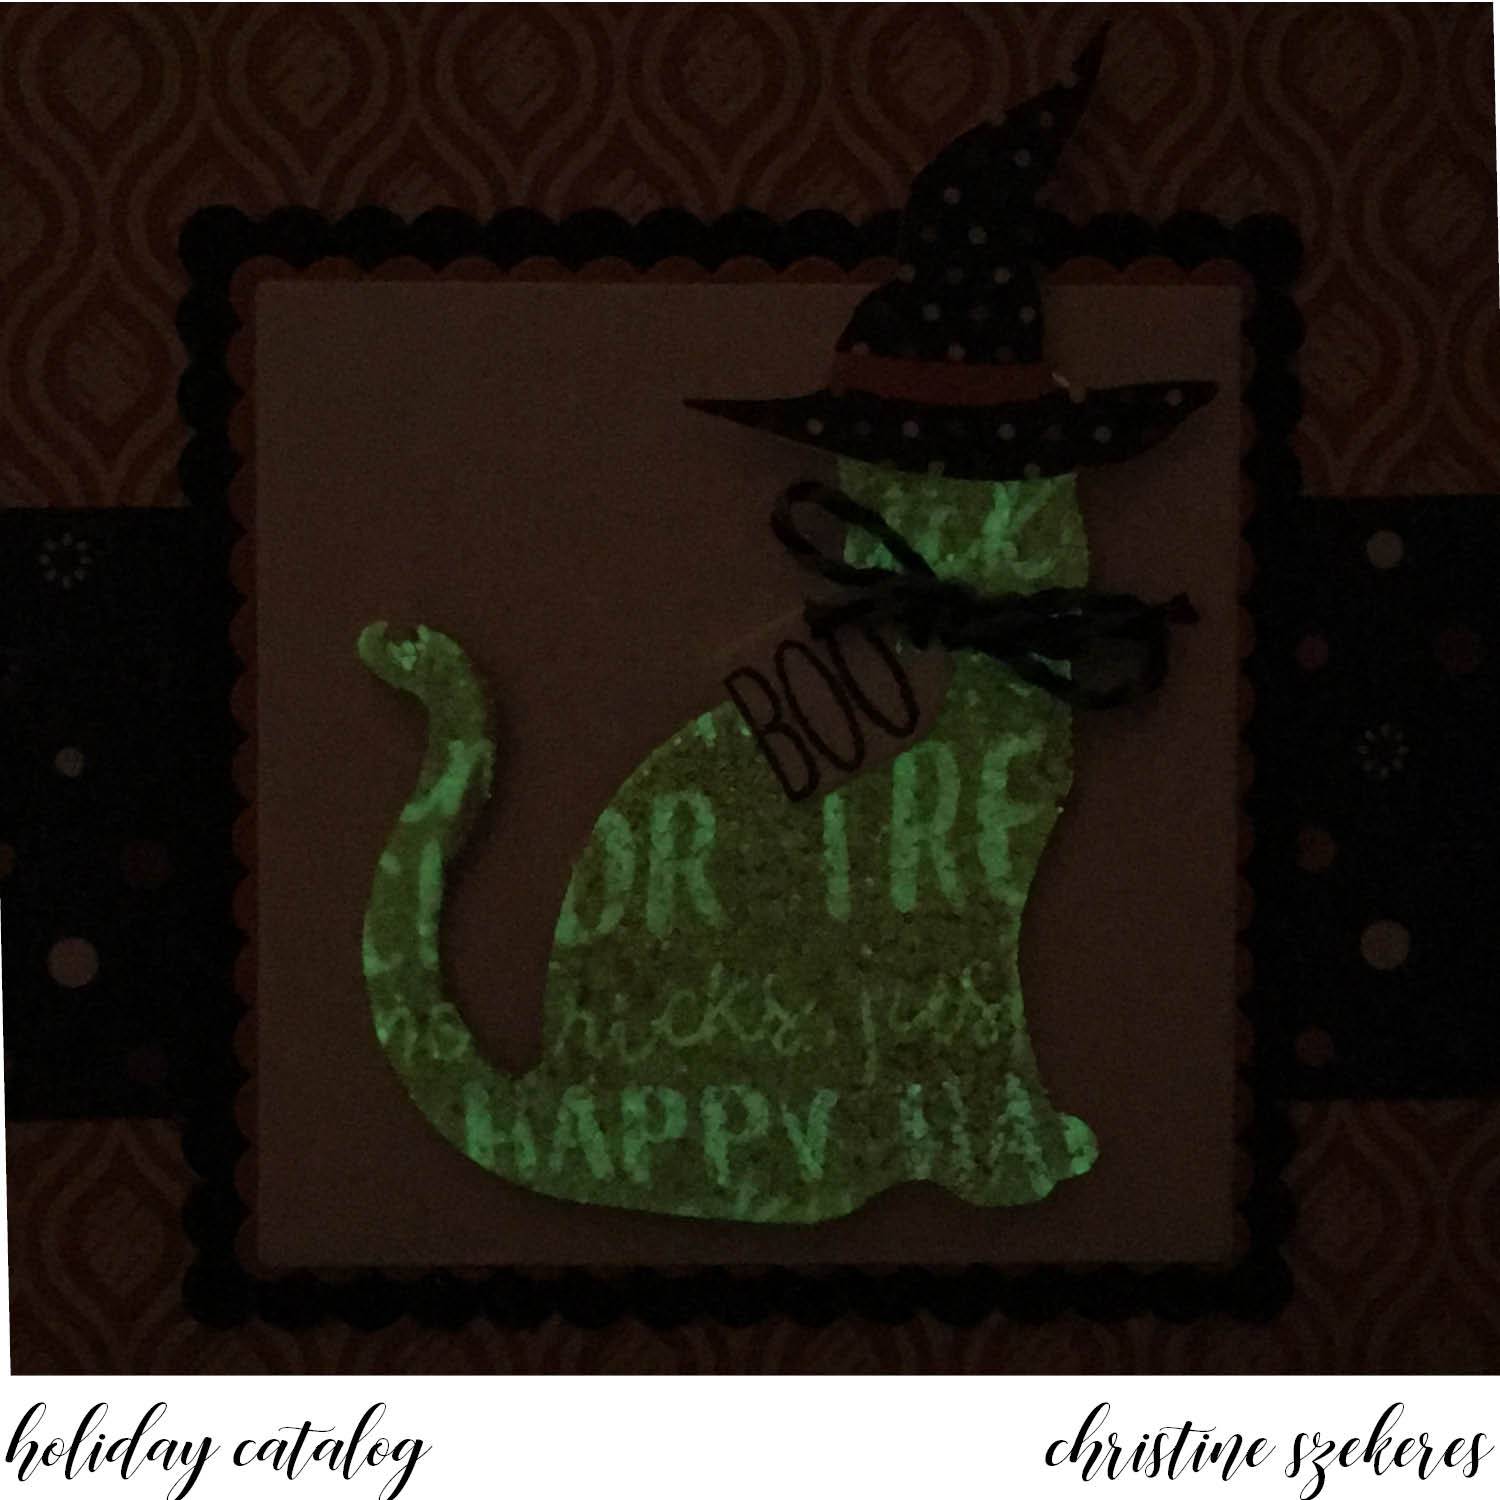
The card is very straightforward, with one *small* exception … the surprise. Halloween is my favorite holiday and I’ve always loved adding little extras whenever possible. In perfect Halloween fashion, the surprise appears when the lights go out and you see kitty glows in the dark! To achieve this I used Wow! glow in the dark embossing powder and Versa Mark ink. First, I smeared VersaMark ink all over the punched cat and then poured on the embossing powder, which is transparent (allowing the paper to show through) but also applying a glow in the dark look. I’m not the best photographer, but this was what I was able to capture, it doesn’t even come close to doing justice to the effect and I’m sorry for that. Kitty gets a witches hat (fussy cut from the DSP) and a little tag (cut using the Coffee Cups framelits).


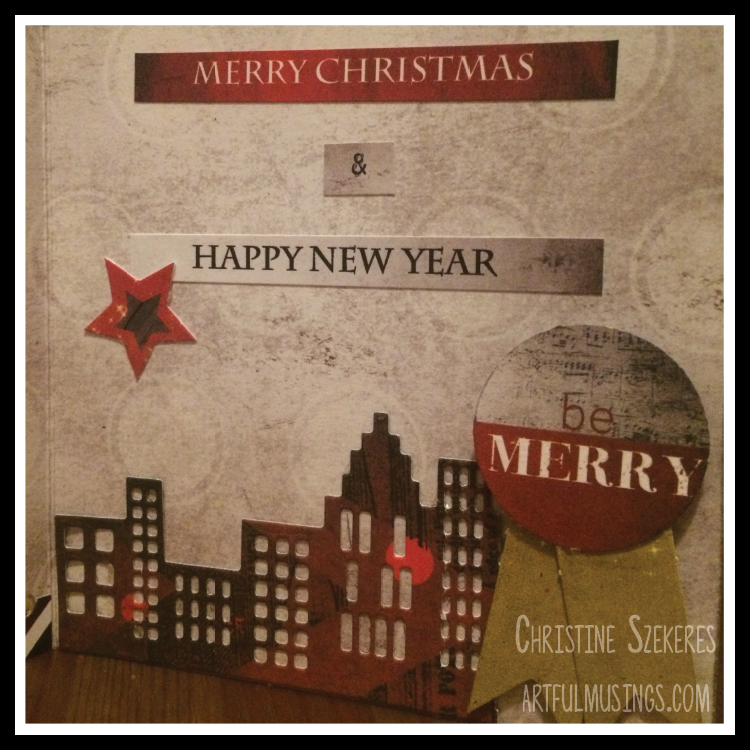
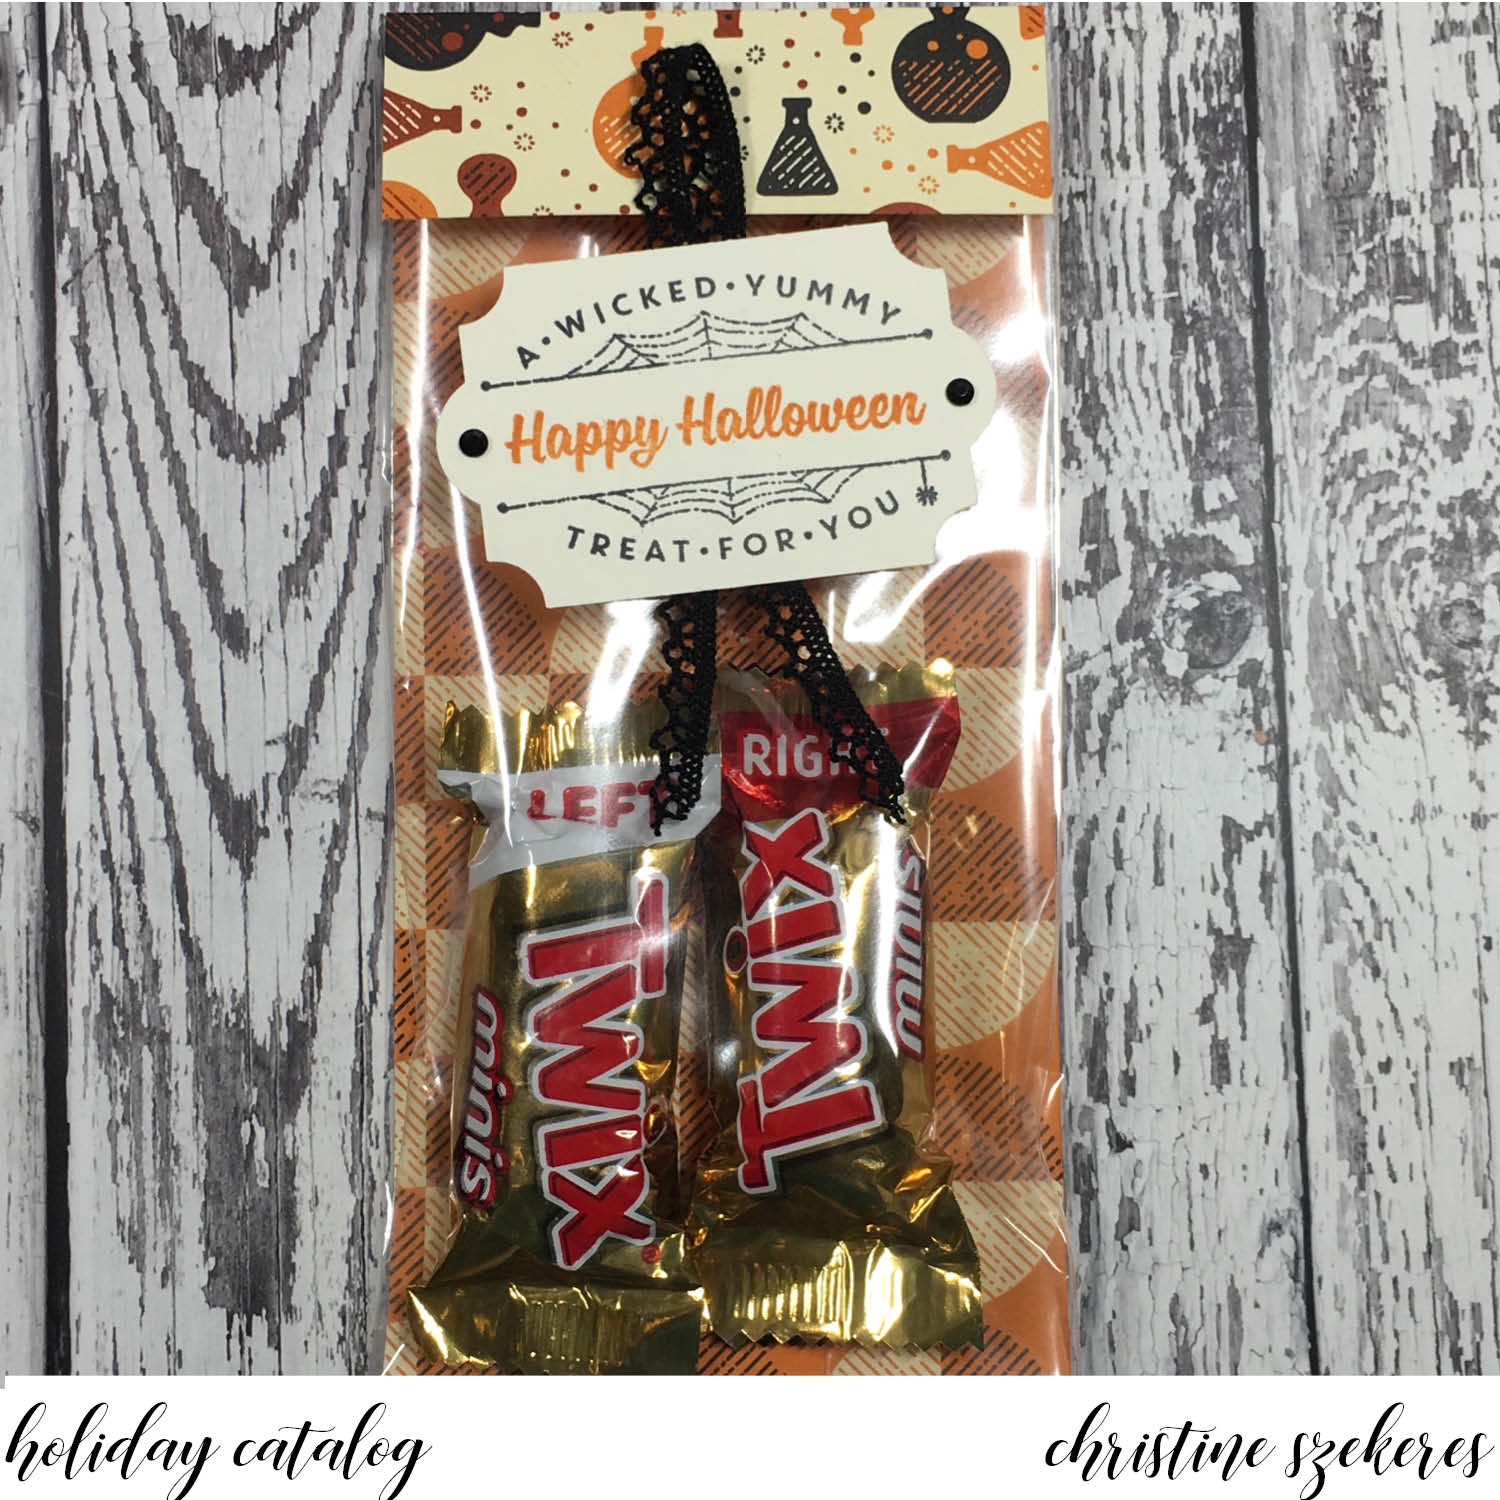
Next up, a couple of other items, one card and one treat bag, featuring the Spooky Night Suite – arguably my favorite of the new catalog. I made these at a recent demonstrator event here in the the Pacific NW. I am loving the new black rhinestones as well as the new Everyday Label Punch. The card shows the versatility of the moon and stars die from the Card Front Builder set.


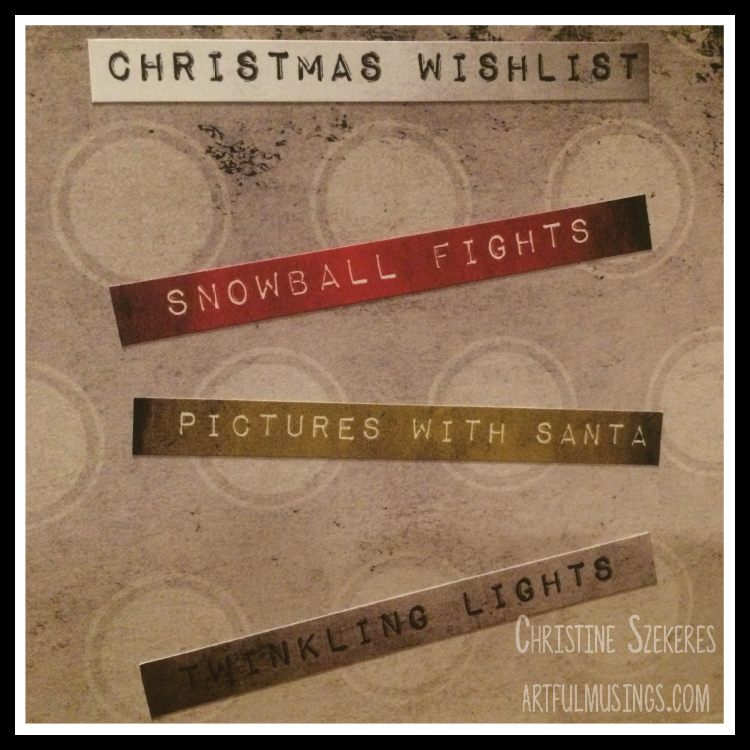
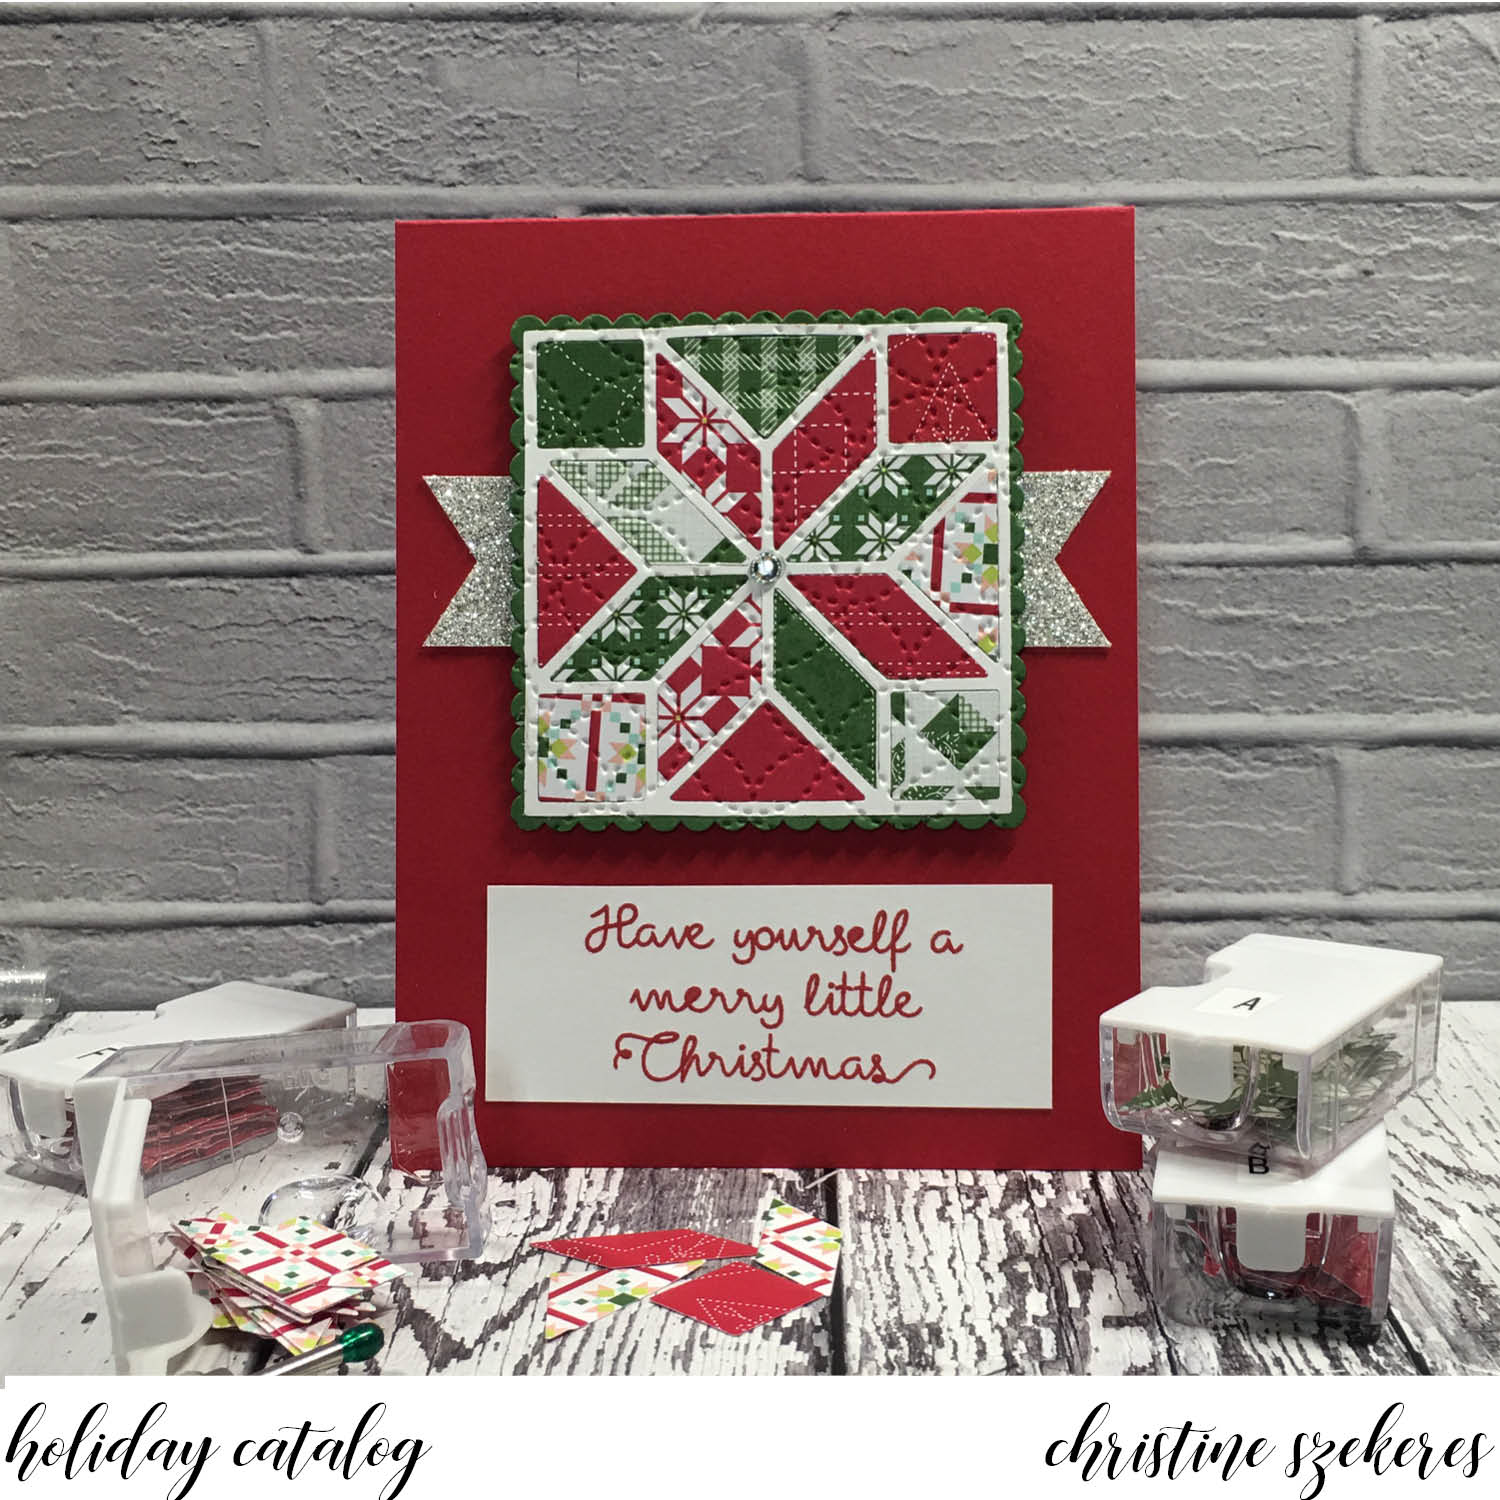
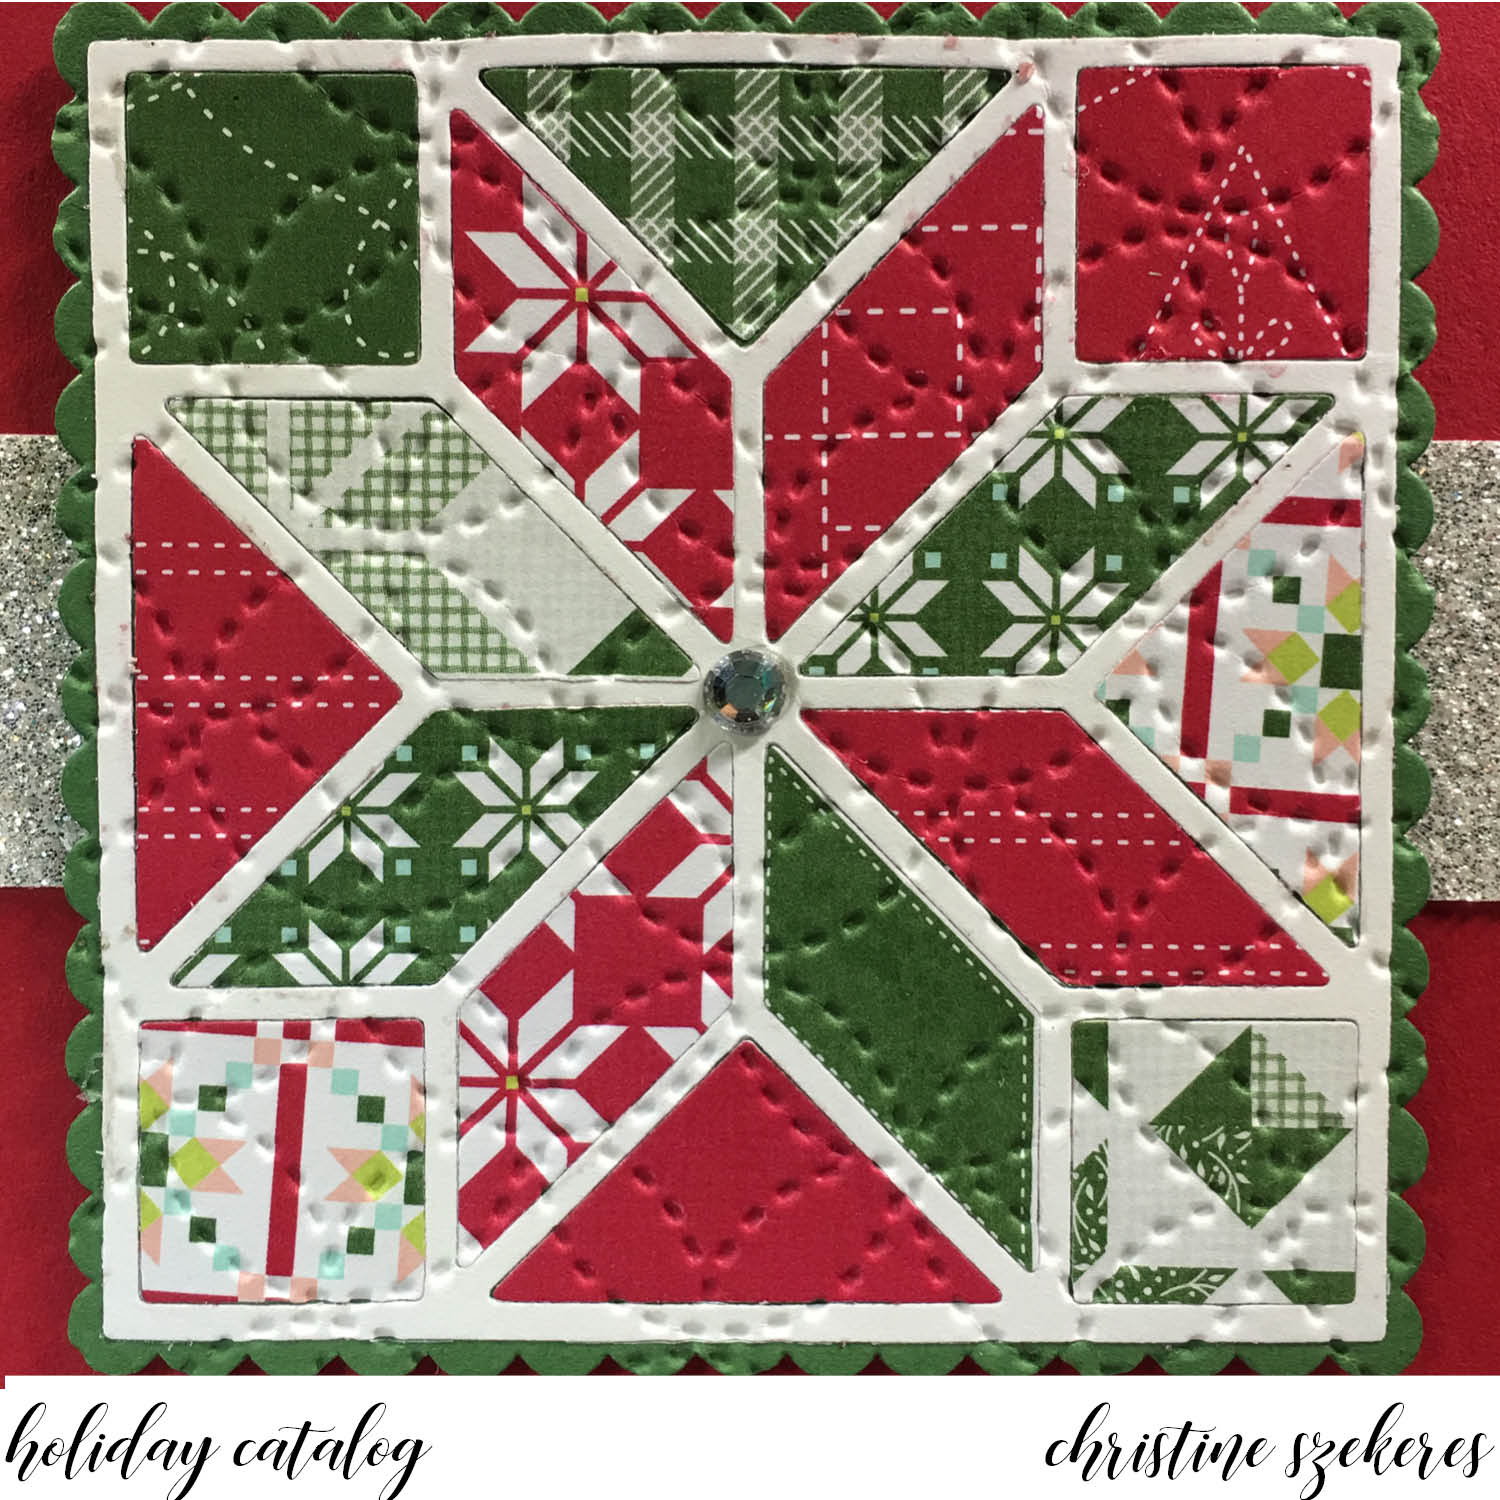
Finally, I would like to share a Christmas card I created using the Quilted Christmas Suite. After designing and making 8 kits and 9 complete cards I can say with 100% certainty I have a love-hate relationship with this suite. I LOVE the images and the coordinating dies are awash with possibilities, one being paper piecing, which is the focus of my card. Hate might be too strong a word, but after making all these kits and cards for a shoebox swap, I know that getting the coolest cards using this set takes work. Fun work, to be sure, but not a quick card. I used the Quilted Christmas DSP for my quilt pieces and once it was all pieced together ran it through the Big Shot with the Quilt Top Textured Impressions embossing folder – it adds that perfect finishing touch to the quilt block, don’t you agree?


Thank you for sharing a bit of your time with me today. Until next time, remember, creativity and imperfection live together in all we do. “Grace is the face love wears when it meets imperfection.”

~xoxo

Supplies Used
Christmas Quilt Bundle (146026) & Quilted Christmas DSP (144617)
Quilt Top Textured Impressions Embossing Folder (144687)
Spooky Cat Bundle (146014) & Spooky Night DSP (144610)
Black Rhinestone Jewels (144639) & Vintage Crochet Trim (144611)
Dazzling Diamonds Gilmmer Paper (135315) & 3″ x 6″ Cellophane Bags (141704)
Dies: Coffee Cups (143745) & Layering Squares (141708)

Christmas in July | Carols of Christmas Blog Hop

Hello, crafty peeps! I hope you are enjoying the Carols of Christmas blog hop. You should have arrived here from Jennifer’s blog, but if you started here that’s okay, the links to all the talented designers are at the bottom of this post. This hop is focused on the new Carols of Christmas stamp set, which is part of the new holiday catalog.

Beginning on August 1st Stampin’ Up! customers will have the opportunity to purchase this set or the bundle, which includes the stamps and coordinating dies. I love this bundle. The stamps are lovely with these large sentiments that create great focal images for your holiday creations. The Card Front Builder dies are quite innovative with a beautiful border, a night sky, some poinsettia corners and other wonderful elements.

I know, I know, I know … Christmas already, it’s still summer! Decorations and treats seem to arrive earlier and earlier each year. On the positive side, it’s a great chance to get a jump on your handmade cards and gifts.


The Merry Little Christmas suite is being called a “mega” suite as there are two stamp sets, a die set, and a punch, not to mention two coordinating DSPs and several trims and embellishments all coordinated together. The suite is located on pages 10 – 13 in the holiday catalog. Today I used the Carols of Christmas stamp set, the Card Front Builder dies, and the Merry Music Specialty DSP. I also used some of the new Boxwood Wreaths and the Silver 3/8″ metallic edge ribbon, which I dyed using my Cherry Cobbler reinker.

My first card uses the largest stamp in the set, Deck the Halls, as the focal image. I began with an A2 (4.25″ x 5.5″) Cherry Cobbler card base. I cut a piece of the white Merry Music DSP to 4″ x 5.25″ and mounted it to the base. Next, I cut a 2″ x 3″ piece of the black Merry Music DSP and using the Banner punch, created a banner. I die cut the largest oval from the Layering Ovals out of Cherry Cobbler and the largest scalloped oval out of Whisper White and stamped “Deck the Halls” on the scalloped oval in Cherry Cobbler ink. I adhered the scalloped oval over the Cherry Cobbler oval. I wanted a matching trim, but none of the red ribbons I had looked right. What to do? Dye white ribbon, of course! If you haven’t dyed your own ribbon, you’re missing out (check out this post for more on dying ribbon).


Once the ribbon was dry I cut two pieces and attached them to the back of the oval using mini glue dots. HINT: I prefer mini glue dots over liquid glue or tape runner for adhering ribbon and other trim to paper. I find it holds faster and better in the long run. I adhered the oval and ribbons to the banner and finished off the front with one of the new Boxwood Wreaths, which I glued down with mini glue dots.

For my second card I decided to make a shaker card. I began with an A2 Whisper White card base. I cut a Garden Green panel to 4″ x 5.25″ and ran it through my BigShot to cut out the three trees. Using multi matte medium, I glued a piece of acetate in place behind the trees, creating the front of my shaker card. Using the small star cluster stamp from the Carols of Christmas set, I stamped it all over the front of this panel using Garden Green ink for a tone-on-tone effect. HINT: Rotate the stamp to maintain an “organic” feel on the panel. Next, using the largest Layering Circles die I cut a panel in Whisper White and stamped “Peace on Earth” in Garden Green ink. I also cut the largest scalloped circle in Cherry Cobbler for a matte. I glued these two panels together and sat them aside.


Now it’s time to build the shaker. I wanted to make sure the shaker bits stayed within the tree shapes so it was the Stampin’ Up! Foam Adhesive Strips to the rescue. These strips are perfect for getting into small nooks and crannies and creating custom shaker cards. I filled in the rest of the panel using standard foam tape. Using a paint brush and my anti-static embossing buddy, I went around the inside edges of the foam tape. This helps reduce static between the acetate and the shaker bits and neutralizes any adhesive on the side of the foam tape. HINT: Make sure to do this step BEFORE you expose the adhesive. I added shaker bits (if you’re like me, you’ve glued the backing panel on with no shaker bits inside at least once) and adhered a piece of Merry Music DSP to the shaker panel. The final touch, a deer die cut out of sparkling silver paper.


There is a ton of inspiration throughout this hop. Since you started here, I encourage you to grab your favorite beverage and visit the other talented bloggers listed below. Next up is the talented Diana. Until next time, remember, creativity and imperfection live together in all we do. “Grace is the face love wears when it meets imperfection.”

~xoxo


Supplies Used:
Carols of Christmas/Card Front Builder Bundle (146037)
Banner Punch (138292), Layering Ovals (141706) & Circles (141705)
Card Stock: Whisper White (100730), Cherry Cobbler (119685), & Garden Green (102584)
Ink: Cherry Cobbler (126966) & Garden Green (126973)
Paper & Embellishments: Merry Music Specialty DSP (144623) & Boxwood Wreaths (144176)
Foam Adhesive Strips (141825) & Silver 3/8″ metallic edge ribbon (144213)

Fun & Crafty | “Oooh, Something Shiny!”

Hello my crafty peeps! I’m happy to be here again this month as part of the Fun & Crafty blog hop. This month’s theme: “Oooh, Something Shiny!” is one we can all relate to, particularly at this time of year. I’m sure you are NOT like me … I’m sure your Christmas and New Year’s cards are already done … however, should you find yourself in a last-minute rut, I hope you take some inspiration from the below as well as all the other inspiring projects in this month’s hop.

fun-n-craftybloghop

If you are anything like me you look for stamps and dies that are versatile. When I saw the “Greetings from Santa” stamps and “Detailed Santa” dies, I knew it would be simple to create a number of cards that were different. Far from requiring a lot of thought, these dies and stamps are pretty straightforward in their versatility making them some of my favorite ‘go to’ sets for holiday cards.

For this month’s hop I decided to showcase the simple versatility of these stamps and dies using three different card stocks and three different glitter papers. Each card contains the same elements, but each looks vastly different due to the color combinations. The first combo, ‘Straight Up Christmas’, combines red and white. It is simultaneously colorful and whimsical. The second combo, ‘Frosty Friends’, combines red and dazzling diamond. This is the bling-y version of the card. The third and final combo, ‘Winter’s Magic’, combines silver and blue into an elegant version that evokes a cool winter’s day.

dec16_7  dec16_1  dec16_2  dec16_3

What I especially love about these two products are all the extra images and dies that can be used to add little touches to your envelopes. Here are a couple of examples of what I mean.

dec16_5  dec16_6

Oooh, something shiny wouldn’t be complete without a wee bit of Chibitronics fun. Below is the fun trade I created for a demonstrator event back in September. I used the Cookie Cutter punch and stamp set to create this light up reindeer to guide Santa’s sleigh.

dec16_4  dec16_8

There is a ton of inspiration throughout this hop. If you started here, please visit the other talented team members listed below and leave them some blog love! Until next time, remember, creativity and imperfection live together in all we do. “Grace is the face love wears when it meets imperfection.”

~xoxo
Beanie

  1. Tobe BThe Craft Sea
  2. Christine Szekeres – Artful Musings (you are here)
  3. Pamela Wu – Stinky Tofu
  4. Kathy Thisted – Stampablog
  5. Jennifer Blomquist – Northwest Stamper
  6. Danielle Elvin – Going to Collage

Supplies Used:
Stamps: Greetings from Santa
Dies: Detailed Santa Thinlets
Cardstock: Night of Navy, Cherry Cobbler, & Whisper White
Glitter Paper: Dazzling Diamond, Silver & Red
Ink: Versa Mark
Embossing Powder: White & Red
Other: Fine-Tip GlueEmbossing Buddy

previousblog  nextblog

Fun & Crafty | November Blog Hop

Hello, friends! I’m on the blog today with a new project using the Tin of Tags kit currently for sale in the Stampin’ Up! Holiday Catalog. This is a new blog hop that our group of demonstrators are planning to have on a regular basis.

fun-n-craftybloghop

Stampin’ Up! kits provide a great value and allow for loads of creativity. Almost everything needed to complete 30 gift tags is included in the kit. The only thing you need is the coordinating stamp set, adhesive, and ink pads. The kit contains full color instructions and the tags are cute and super simple for various crafting skill levels. I like this kit so much that I am making it with my church group.

nov16_2  nov16_8

There are 10 different tag styles and you have supplies enough to make three of each style. Here are a few pictures of the tags as I made them along with a final picture showing all of the tags. This is a very quick project, taking between 1 and 2 hours, depending on skill level.

nov16_1  nov16_3

nov16_4  nov16_7

nov16_5  nov16_6

There is a ton of Christmas inspiration throughout this hop. If you started here, please visit the other talented team members listed below and leave them some blog love! Until next time, remember, creativity and imperfection live together in all we do. “Grace is the face love wears when it meets imperfection.”

~xoxo
Beanie

  1. Tobe BThe Craft Sea
  2. Pamela Wu – Stinky Tofu
  3. Kathy Thisted – Stampablog
  4. Jennifer Blomquist – Northwest Stamper
  5. Stacey Lane – A Work of Carte
  6. Susan Schultz – Stampin By The Bay
  7. Christine Szekeres – Artful Musings (you are here)
  8. Nicole Flournoy – Inky Fingers Stamping
  9. Danielle Elvin – Going to Collage

Supplies Used:
Tin of Tags
Tin of Tags Stamp Set
Inks: Crushed Curry, Island Indigo, Old Olive, & Real Red
Acrylic Blocks: A, D, & G
Adhesive: Mini Glue Dots, Stampin’ Dimensionals & Fine Tip Glue

previousblog  nextblog


Fun with Felt

I’ve long enjoyed the tactile feeling of mixing different mediums in my work and one of my favorites is felt. It is scratchy and soft all at once and comes in a variety of rich and wonderful colors.

Die cutting felt is pretty simple provided you have the right material. I find that the best cuts come from felt that has at least some portion of wool. I try to stay away from polyester and other “fake” felts, opting instead to spend a bit more for felt that is at least some portion wool. I purchase my felt locally. You can also get it online.

Back in the fall, Memory Box came out with a line of dies specifically designed to cut felt and be sewn together. I was intrigued. I bought the stocking and the large snowman and then they sat, untouched, in my die storage. Sigh…

Early in December I had the opportunity to take a class working with these dies – I promised myself if I didn’t enjoy it I was going to return the dies no matter how cute they were. Class was designed to allow the completion one, possibly two, of the 6 options, which included a stocking, a large snowman, a tiny snowman (named Sheldon), a heart, a star, and a mitten. I ended up completing the heart, the large snowman, and getting a good start on the stocking. Needless to say, I was hooked … and thus began my plush obsession.

Snowmen1 Stocking1

I ended up making stocking ornaments (like the above right) for the intern team at SAMBICA and after making 10, I became somewhat of an expert and found it very relaxing, particularly while watching TV or listening to music. TIP: I like to use dental floss threaders to assist me in getting the needle threaded and for beads that have smaller holes.

Memory Box has expanded the plush line to include some additional spring offerings including: a pocket egg, a folk heart, a heart border, a songbird, a small bunny, and Liam Bunny. There are also several add-on’s that can be added to the above including: flower buttons, small & large poinsettias, small & large snowflakes, holly & berries, and a baby heart. They are so much fun that I have planned another post once I’ve had a chance to finish all the hearts, eggs, and bunnies!

Here is a picture of the winter ornaments I made. I gave the little Sheldon snowman as a gift to several friends. I turned him into a pin by adding a pin back before I sewed him together. He is so precious!

WinterFelt Sheldon1

Until next time, remember, creativity and imperfection live together in all we do. “Grace is the face love wears when it meets imperfection.”

~xoxo
Beanie

Supplies Used
Wool Felt & Poly-Fil
Memory Box Plush Dies
Glass Seed Beads 6/0 (various colors)
DMC Embroidery Floss (various colors)
Tapestry Needle & Floss Threader

Merry & Bright Glass Block

A few years ago I got really into glass block art. I made several and ultimately gave them away to friends. I realized that I didn’t have one of my own. I decided to fix that so “Merry & Bright” was born.

MerryandBright4

Using supplies from my local craft supply (Ben Franklin in Redmond, WA) I was able to put together a wonderful Christmas display. Ben Franklin doesn’t have online ordering so I’ve looked around for all the items and the links are below. I love the Krylon stained glass paint (both translucent and sea glass which is semi-translucent). You should be able to get these locally at Home Depot, Lowes, Michaels, Hobby Lobby, and Joann.

MerryandBright2

It’s pretty simple really. First, spray paint the block and set aside. You might want more than one coat, depending on coverage and look you are trying to achieve. Once dry apply your vinyl image, following the directions on the package. Those with Cricut machines (or any die cutting system) can make their own vinyl decals so I’ve linked to both pre-cut as well as supplies to make your own. If you are cutting your own, I cannot stress enough the importance of transfer tape. Trust me, it will make your life so much easier. I prefer the Cricut brand vinyl, but any adhesive backed vinyl will work.

Vinyl is pretty easy to apply, especially to glass. TIP: When you are removing the top mask, (that transfer tape I mentioned earlier) pull slowly at a sharp 45 degree angle.

MerryandBright1

Once done, you can carefully insert your string of twinkle lights into the block. I just pushed them around until I liked the way they looked. The final step, for me often the most difficult, is the topper. Choosing flowers, ribbon, and ornaments to rest on the top of your block. I used wire-edged ribbon because the bow and tails hold their shapes (and go back into shape after storage) and give the block that finished look. A few green glitter sprigs of foliage and some small red Christmas ornaments complete the look. I wound the ribbon around, tied the bow and then attached the foliage and ornaments using their ends and a bit of thin wire.

MerryandBright3

Insert the block into the metal stand, choose a window, plug in the twinkle lights and sit back to enjoy your festive display. Wishing you and yours Happy Holidays!

Until next time, remember, creativity and imperfection live together in all we do. “Grace is the face love wears when it meets imperfection.”

~xoxo
Beanie

Supplies Used
Krylon Stained Glass Spray Paint
Krafty Blok Glass Block & Stand
Vinyl Sentiment or Image
Vinyl Supplies
Cricut Transfer Tape (this is a must)
Darice White Twinkle Lights
Wire Edge Ribbon
Small Ornamants

Tag … You’re It!

Hello friends! I can hardly believe that we are T-minus seven days from Christmas Eve. 2015 has truly flown by at warp speed. As I prepare for Christmas: baking cookies, buying that perfect little something for a friend or coworker, I am always thinking of presentation as well. The wrapping of Christmas presents … or any present for that matter is almost as important as what is inside. The right packaging can pull a gift together and let the recipient know how much you care and really reflects the work put into handmade gifts in particular.

TagYouRIt1

What I especially like is the size of this project, I can pre-cut tags and other elements and then sit in front of the TV watching a Christmas movie (Scrooged, White Christmas, Holiday Inn, or Elf). They go together quickly and I make more than I need for those gifts that seem to pop up at the last minute.

With this in mind, I decided to pull out my Christmas papers, Yuletide by 7 Dots Studio and Vintage Christmas by Blue Fern Studios and make some gift tags for the handmade goodies I’m giving friends this year. Any die set will work to make your tags, you can even purchase pre-formed tags in white, kraft, black, and other colors. For these tags I used the Holiday Tags Stamps & Die Set from My Creative Time it is my favorite at the moment. I think they are so festive. I also added sequins, pearls, trees and holly cut from glitter paper, and a bit of festive washi tape. Here are a few pictures to get your creative ideas flowing.

TagYouRIt2  TagYouRIt4  TagYouRIt6  TagYouRIt5

I hope this has inspired you to take a look at your gift wrapping and make some festive gift tags. Until then, remember, creativity and imperfection live together in all we do. “Grace is the face love wears when it meets imperfection.”

~xoxo
Beanie

Supplies Used
YuletideVintage Christmas
Holiday Tags Stamps & Die Set
Pretty Pink Posh sequins
Red Pearls
Heidi Swapp Glitter Paper
Fresh Ink: Currant & Mojito
Christmas Cross Stitch Washi
Christmas Tree Winter Washi

Twenty-Fifth Treasure Chest

Hello and welcome to another day of Christmas inspiration. Today’s project is a simple balsa wood box, perfect for holding onto those little Christmas treasures. I created an accordion booklet but this box could easily hold gift tags or any other Christmas treasures you might have.

December25Box0

First, I removed all the hardware, painted, and set the box aside to dry. I knew I wanted to use the Yuletide collection from Seven Dots Studio, which focuses on rich gold/yellows, reds, and grays so I chose a complimentary paint. This collection is so versatile and I’ve gotten so much use out of the items in the collection kit – truly a little goes a long way.

December25Box1

I began by cutting the paper pieces for the lid, outsides, and inner lid out of Gingerbread. I also chose some flowers and leaves. Using LSG Industrial Chic: Golden Doubloons, I sprayed all the flowers and leaves. I glued the Gingerbread pieces to the lid and all four sides of the box. Using my piercing tool, I punched holes in the center of the lid and attached the porcelain “25” to the lid using brads. I stuck various stickers from the word stickers sheet to the red piece and then glued the piece inside the lid.

December25Box3

For the “Dear Santa” accordion booklet I cut two pieces of Figgy Pudding (the gray side) 4″ x 12″. I scored the first piece into three 4″ panels. The second piece I scored at 1/2″ and then created two additional 4″ panels, finally trimming off the excess 3.5″. This resulted in five, 4″ panels. Using tape runner I attached the two pieces together using the 1/2″ tab. Next, using element stickers and element cutouts from the Yuletide collection, I filled in the panels of my “Dear Santa” booklet.

December25Box5December25Box6December25Box7December25Box9

Finally, I replaced the hardware, added some Merry Christmas washi tape to the sides of the box, and attached the flowers and leaves to the lid. As the final touch, I drew a white dot border using my favorite white pen from Signo. TIP: White pen can be used to create all sorts of borders or accents.

I hope you enjoyed this little sojourn and that it helped boost your Christmas spirits!

Until then, remember, creativity and imperfection live together in all we do. “Grace is the face love wears when it meets imperfection.”

~xoxo
Beanie

Supplies Used
Yuletide collection
LSG: Golden Doubloons
Merry Christmas washi tape
Savvy Cityscape Die
Signo White Pen
Distress Paint: Fossilized Amber