
Hello my crafty peeps and welcome to another Innovation Station post, a monthly feature focusing innovative tips and tricks. Each month I share an innovation that I find myself going to again and again.

This month’s innovation is the rolling marbles technique. This technique reminds me of a Jackson Pollock splatter painting and it’s so simple and fun. Honestly, I’d sort of forgotten about this technique (I used to use it all the time) until a friend demoed it at an event recently. I came home after and began searching for my marbles (literally, not figuratively). Once I’d found them I began playing and couldn’t really seem to stop.
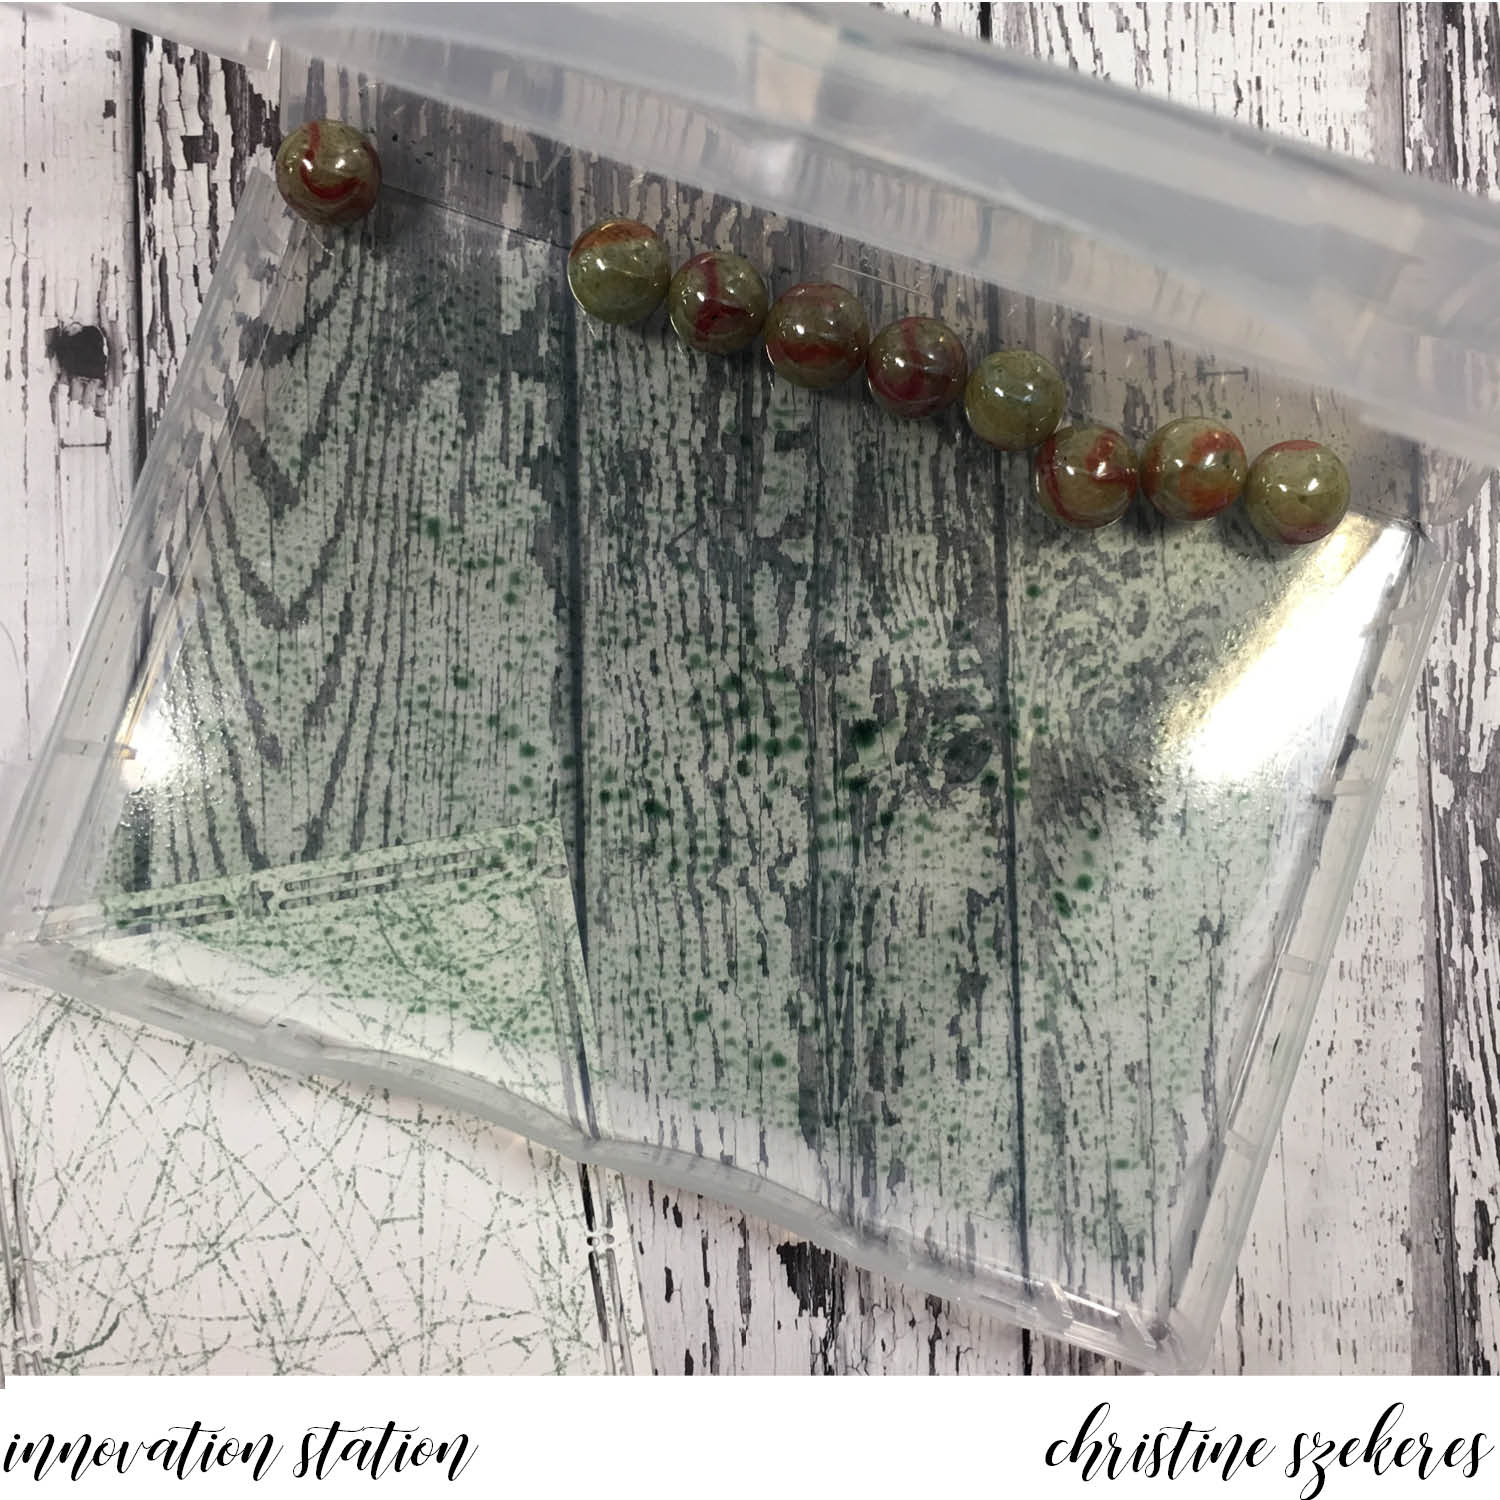
One of the things my friend, Jennifer Blomquist, demoed was using a container (a half wood mount stamp case from Stampin’ Up!) to create this background. I always did this technique in a box and it was messy and sometimes uneven. Needless to say, I thought the stamp case idea was brilliant. The half wood mount case will work for smaller pieces (max size in this case is 3 1/4″ x 4 3/4″), but often I want to do a larger piece so I decided to try using the full wood mount stamp case from Stampin’ Up!, and it was perfect for the larger pieces (max size in this case is 4 3/4″ x 7″). HINT: marble to reinker ratios … half size case between 5 & 7 marbles and 2 — 3 drops of reinker, in the full size case between 9 & 11 marbles and 4 — 6 drops of reinker.
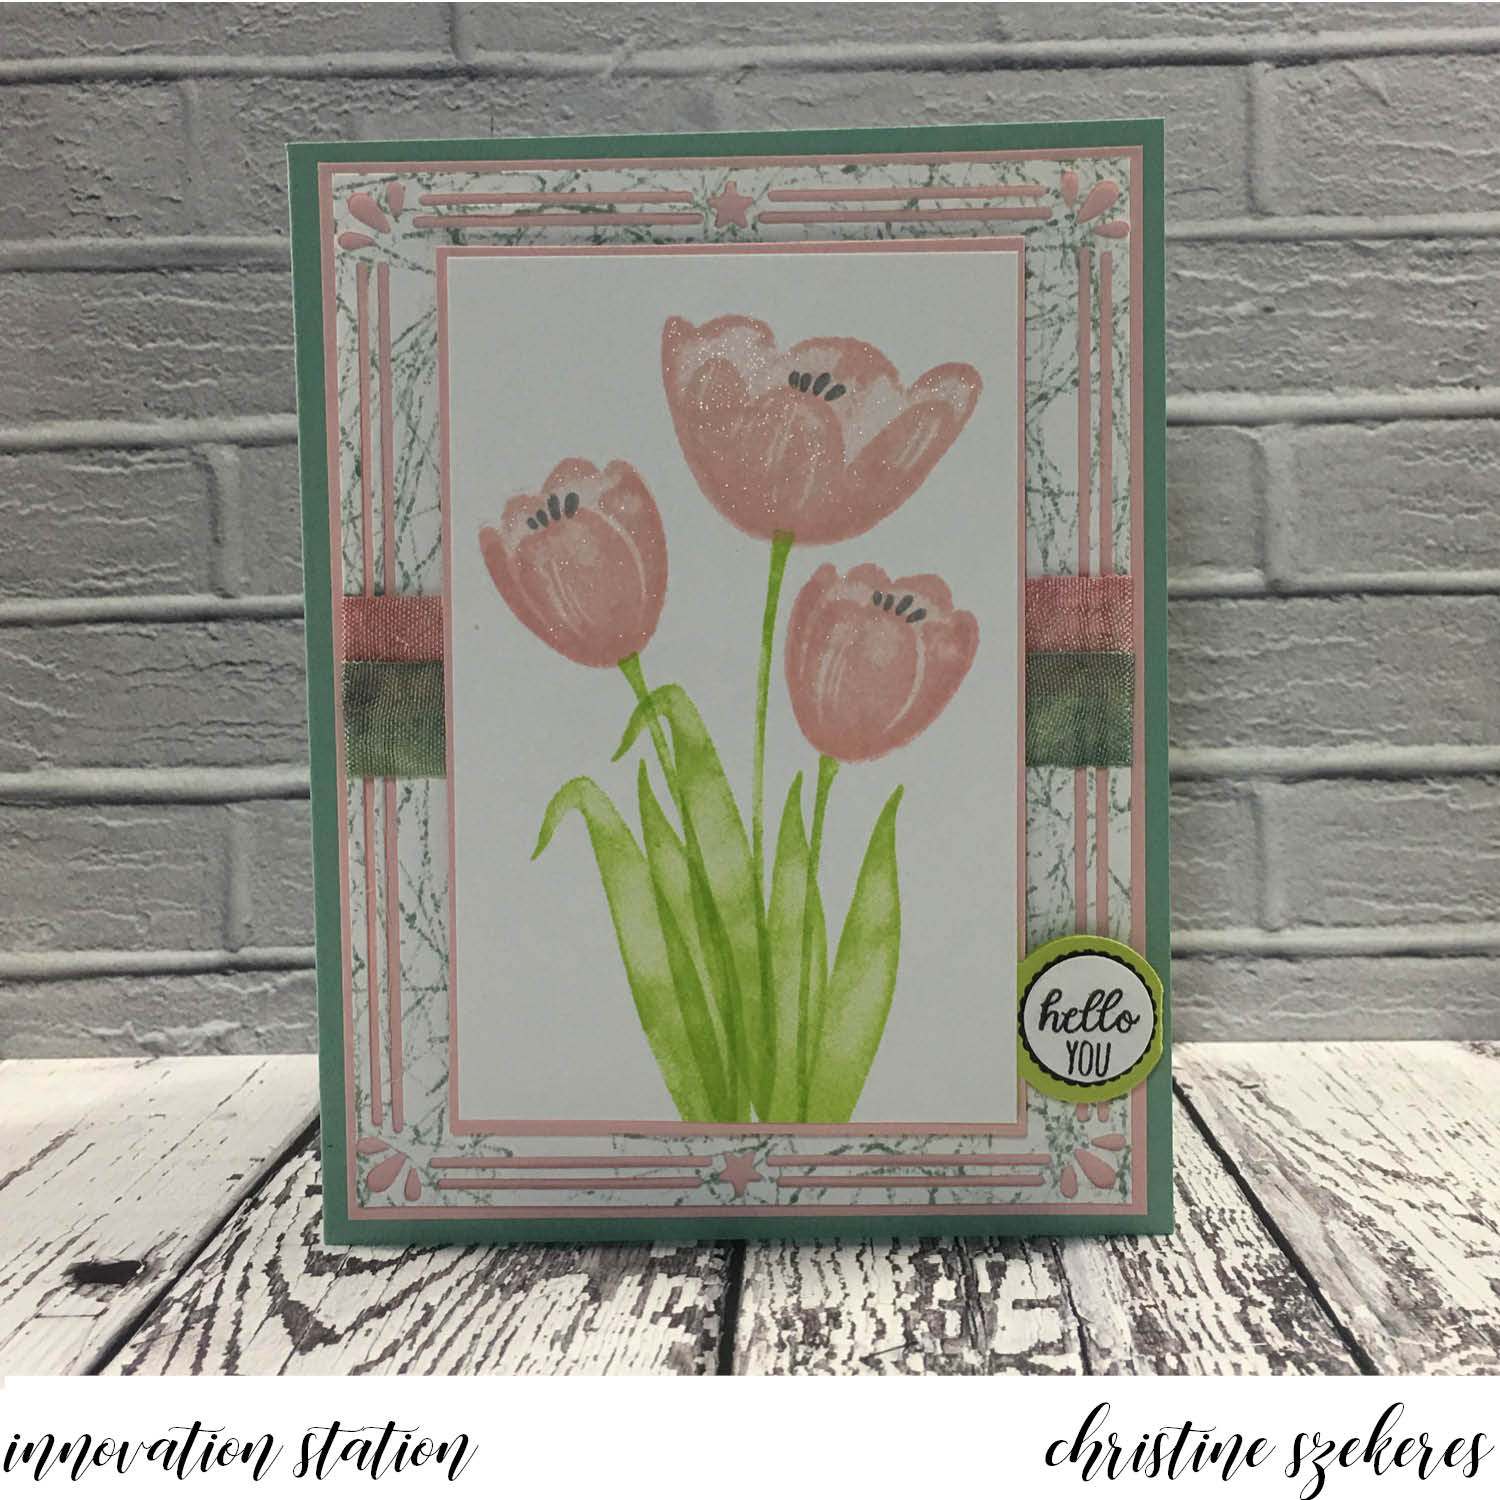
For my first card I wanted to use the new host set, Tranquil Tulips. I love this set! It is both a layering set as well as a mixed media style set, meaning the images aren’t designed to stamp solid, they have a dreamy quality to them. I began with a Mint Macaron A2 card base and cut a matte panel out of Powder Pink (4″ x 5 1/4″) that I mounted to the card base.
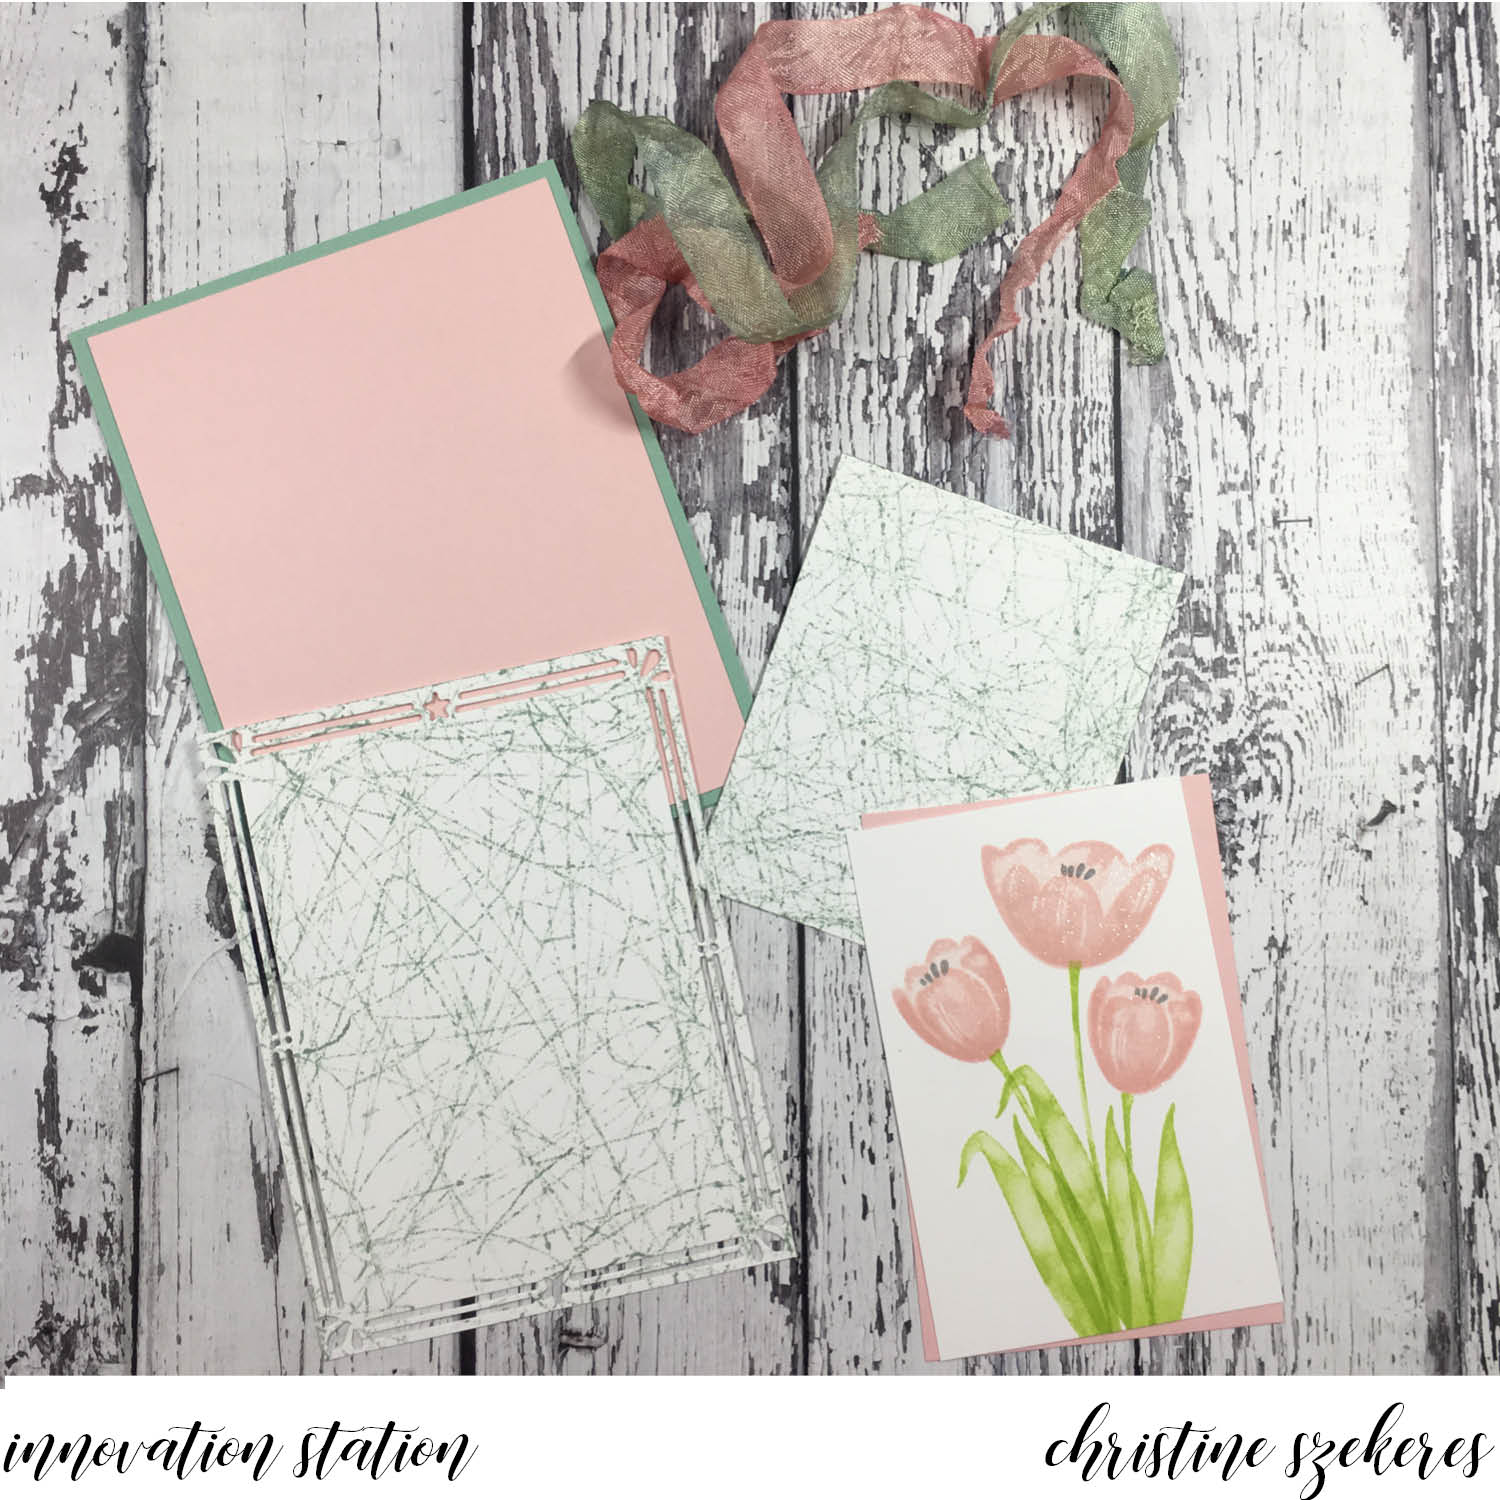
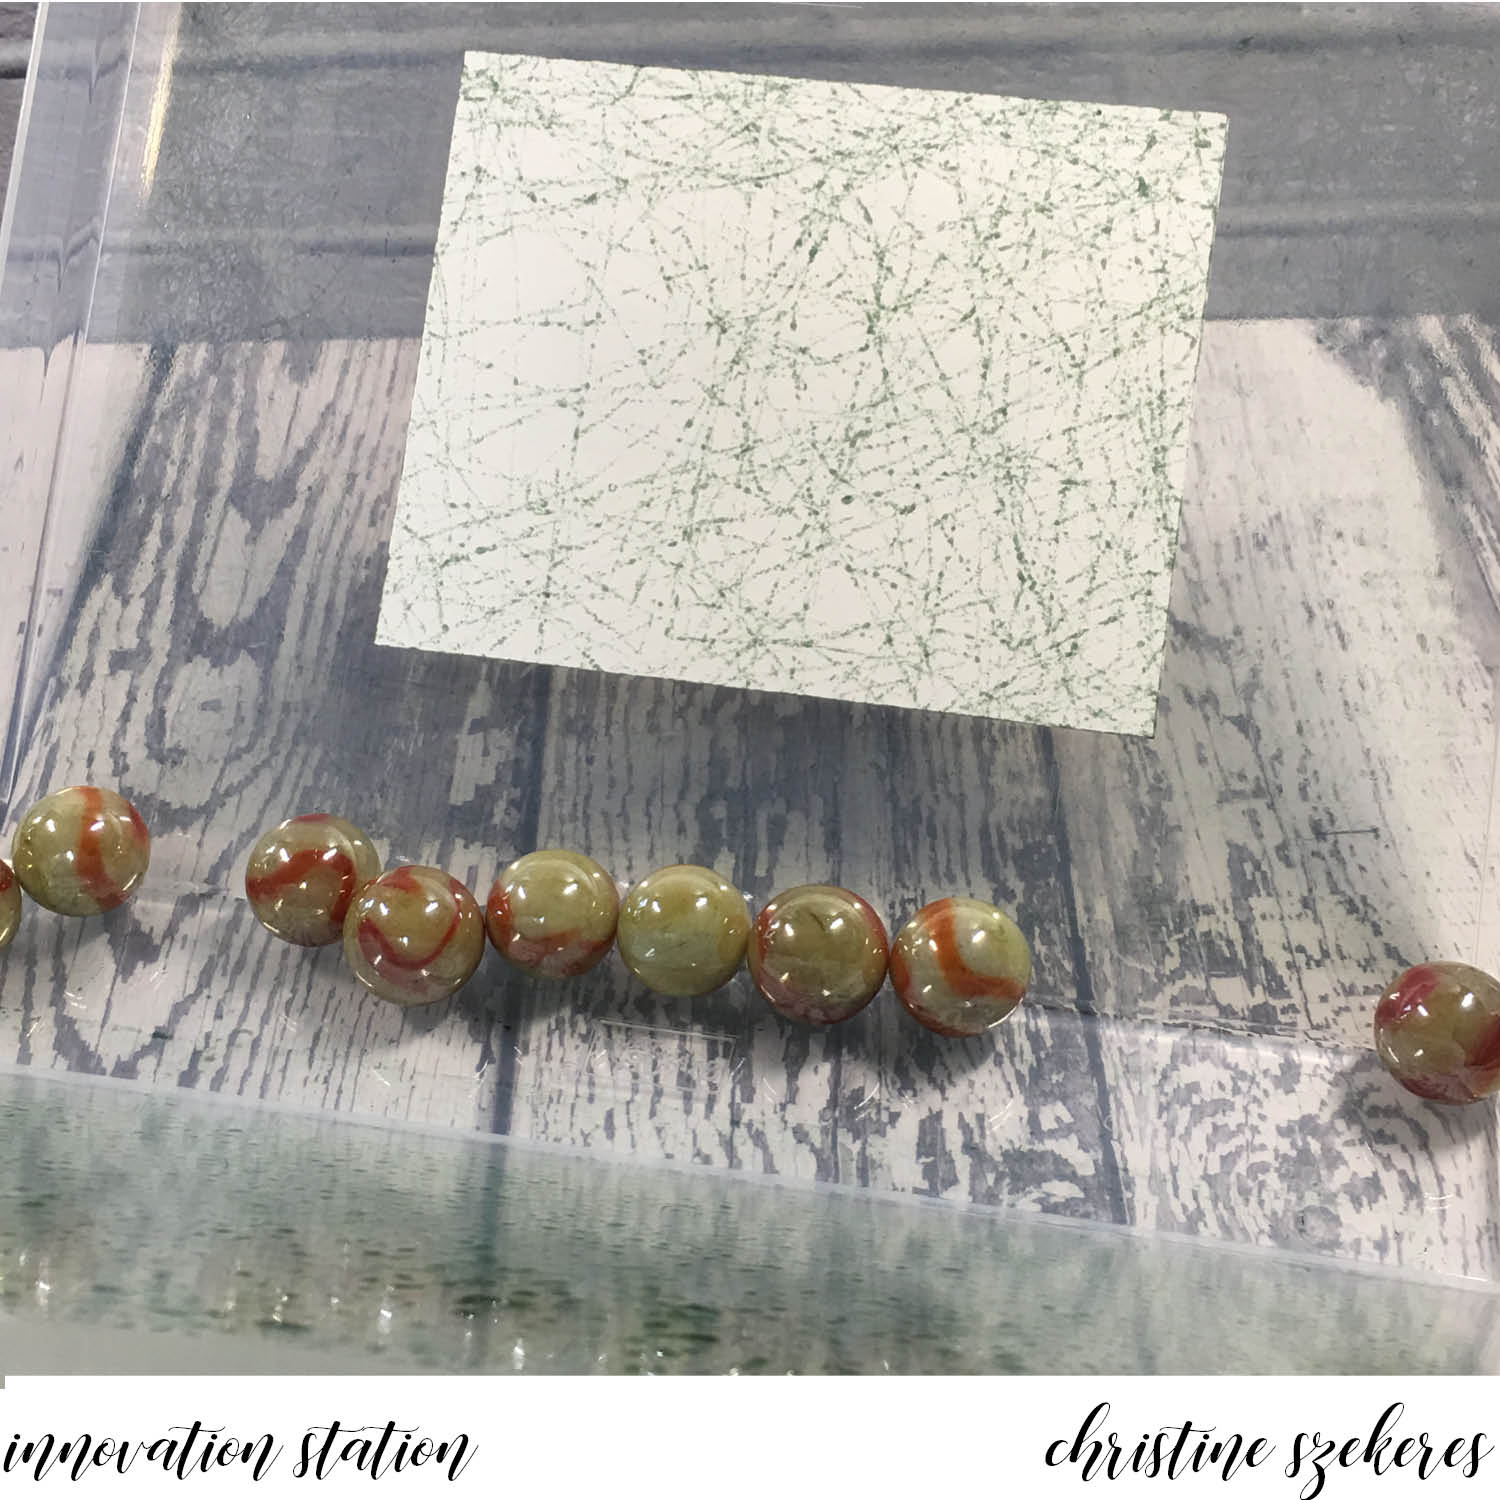
Next, I cut the marble panel out of Whisper White (3 7/8″ x 5 1/8″) and marbled it using a full wide stamp case, 9 marbles, and about 6 drops of Mint Macaron reinker. I put the marbles in the case and then the reinker drops in the middle. I closed the case and moved the marbles around until they were covered in reinker and there weren’t any big drops of reinker remaining. Next, I opened the case and secured the Whisper White panel to the lid using some low tac painters tape. Close the case and flip it over so the panel is now on the bottom with the marbles on top. Begin moving the marbles around the case until you are satisfied with the coverage. HINT: You can add additional reinker if needed by flipping the case back over (so the panel is on top and the marbles on the bottom). Once that was done I ran the it through my BigShot with the border from the Card Front Builder dies.
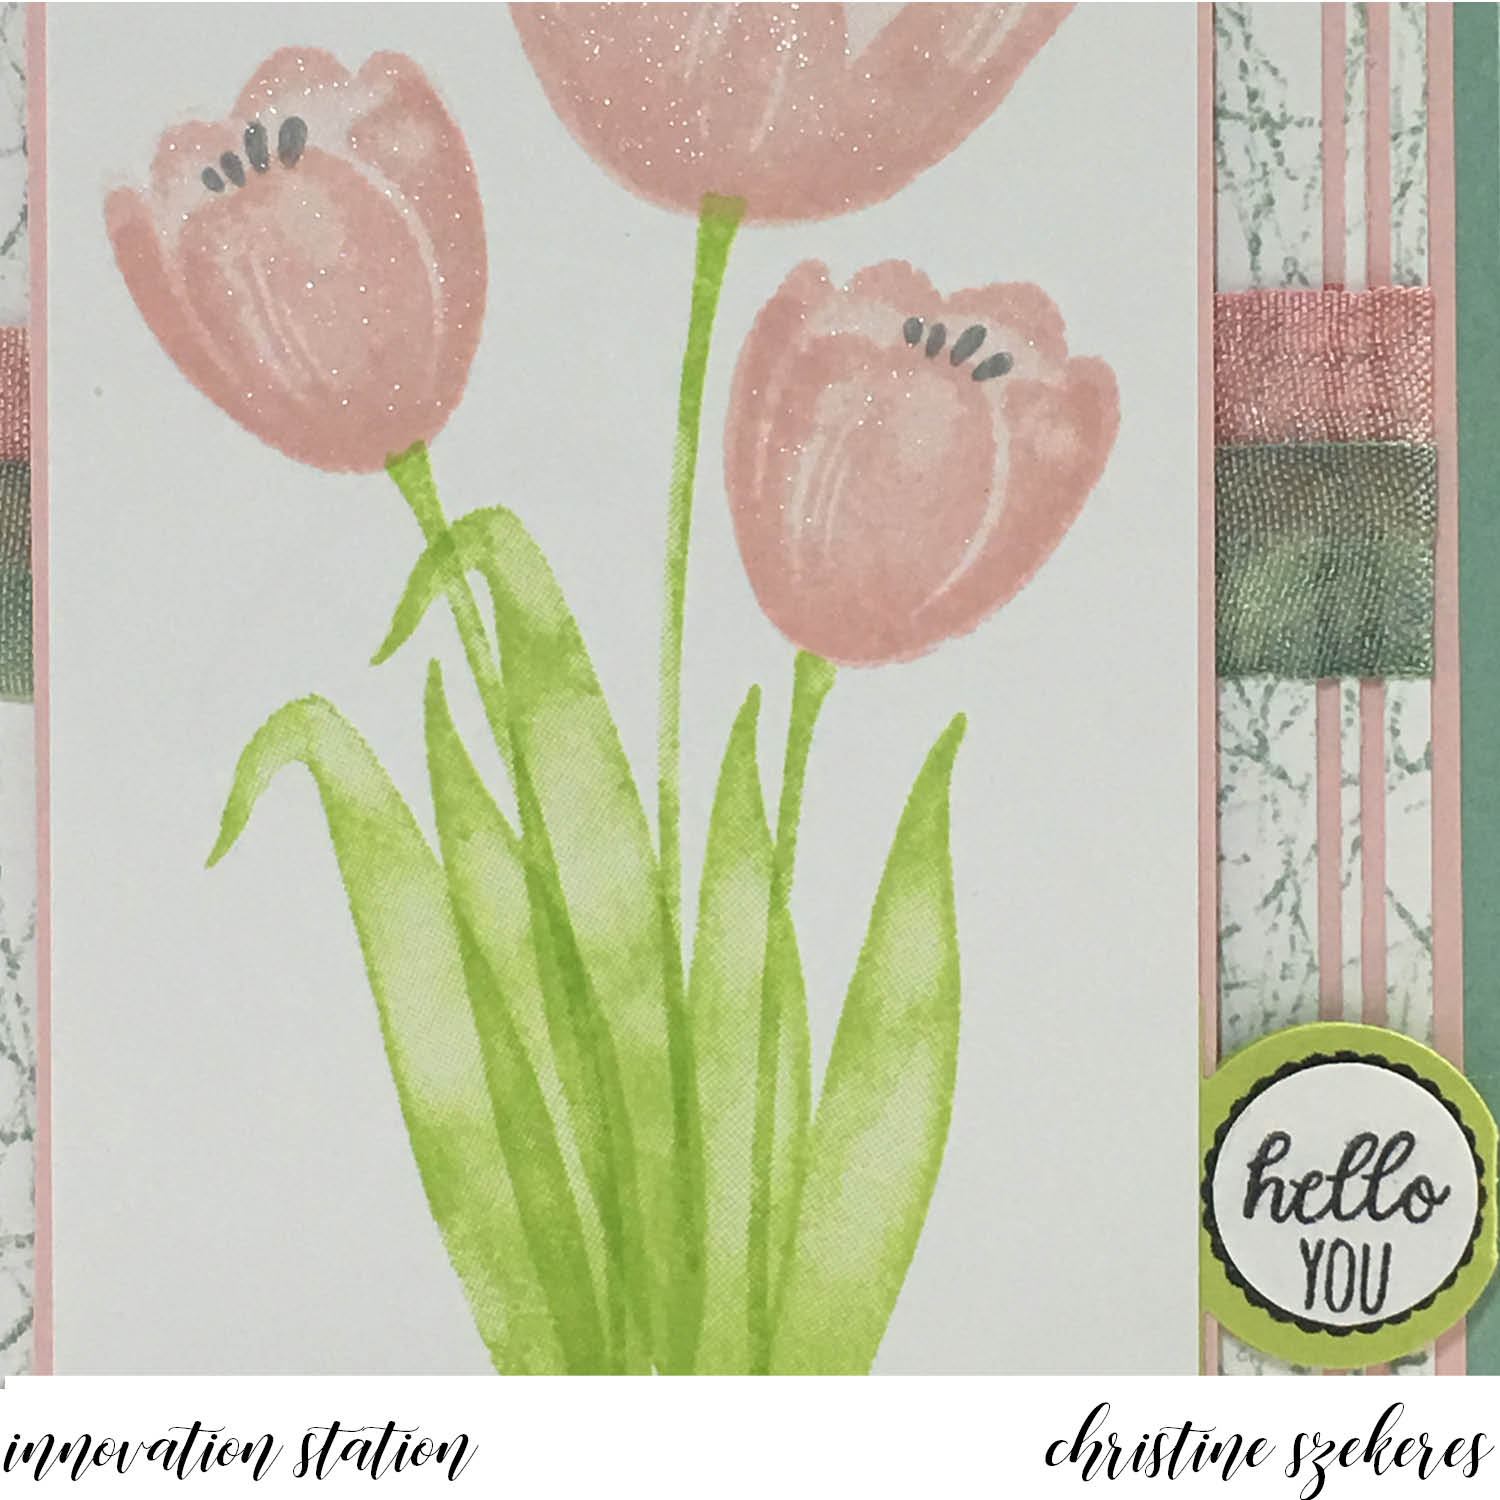
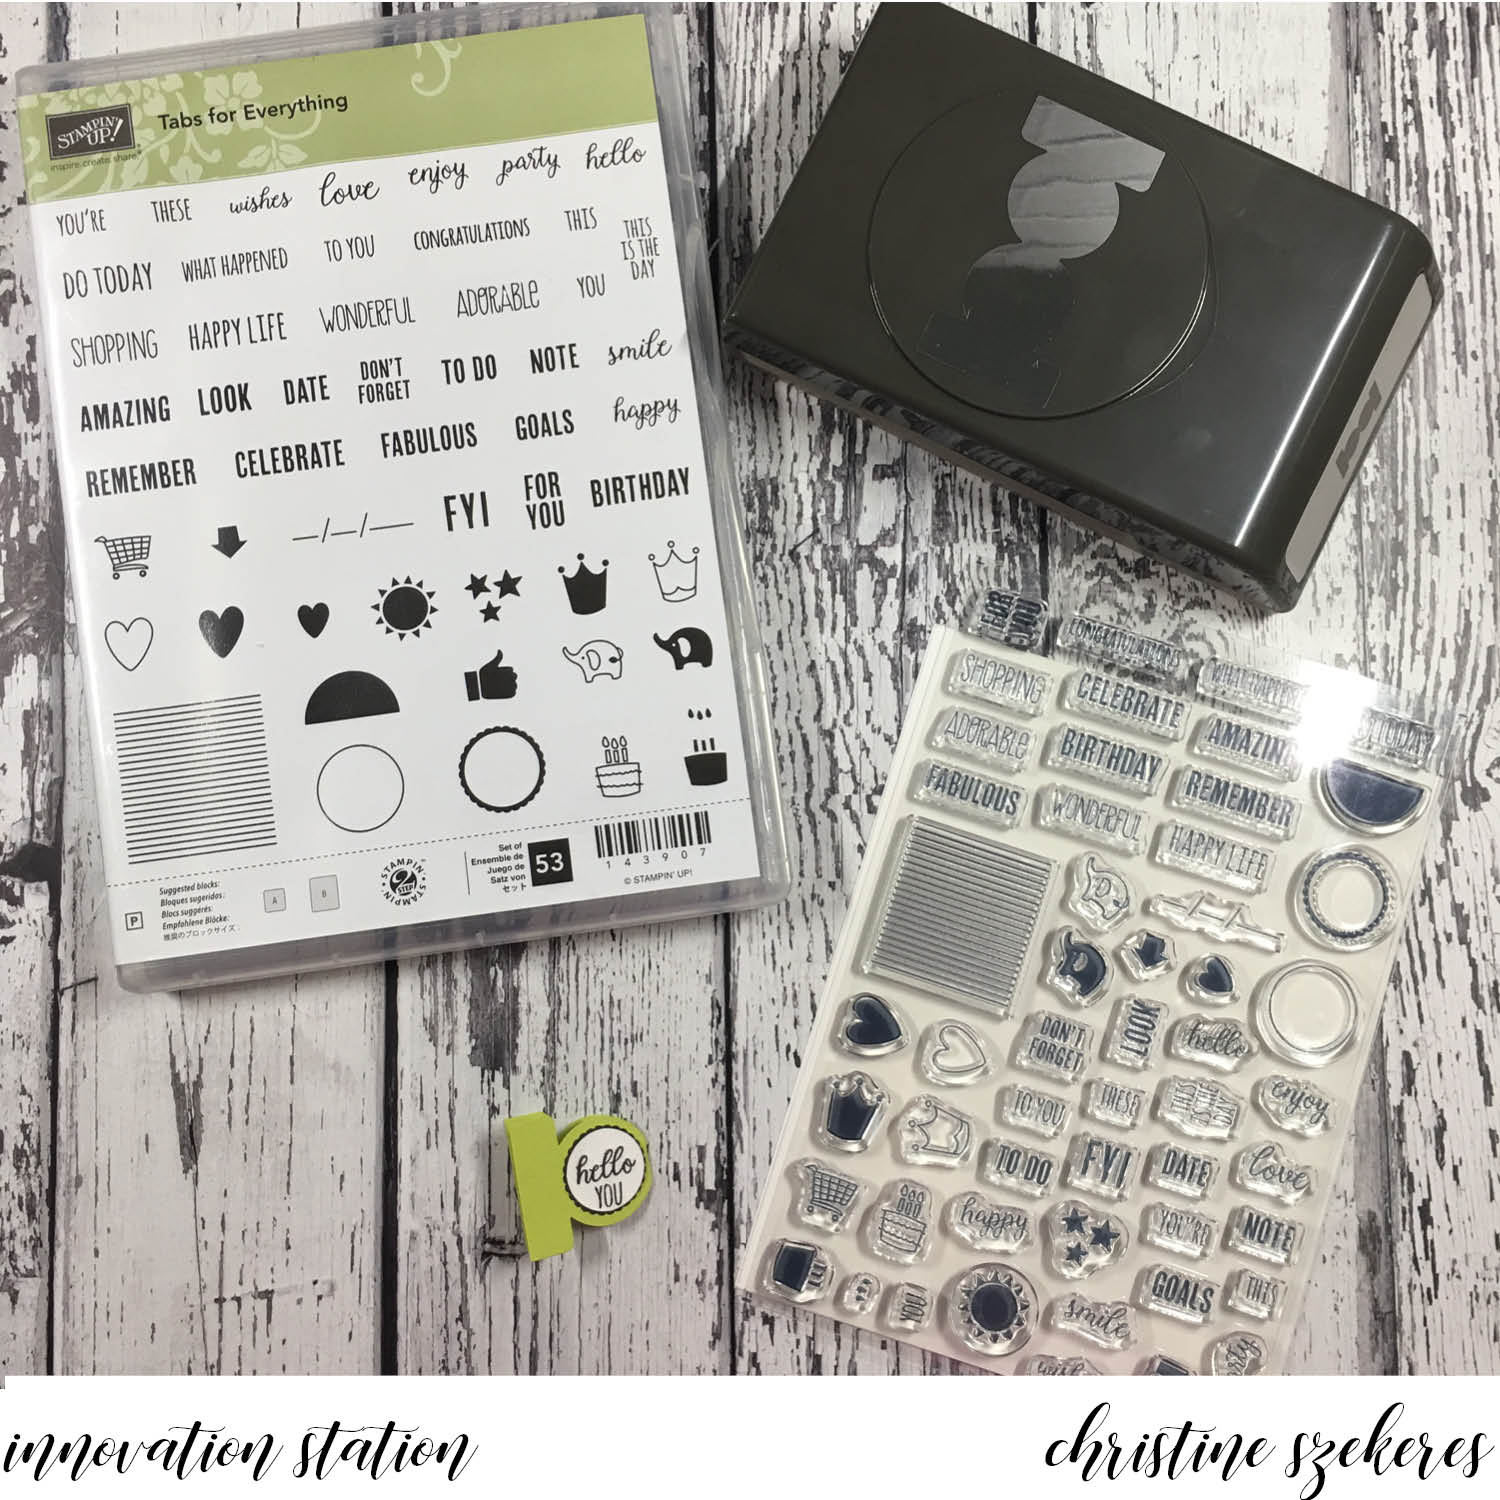
I also the tulip panel is 3 3/4″ x 4 1/4″ and the Powder Pink matte is 3 7/8″ x 4 3/8″. I stamped the tulips, stems, and leaves using Powder Pink, Lemon Lime Twist, and Smokey Gray. HINT: I stamped the stems first, followed by the tulips and finally the leaves. You could also stamp the tulips first, but for optimal placement on the panel, I preferred stamping the stems first. Once dry, I covered the tulips in clear Wink of Stella for a bit of shimmer and shine. I custom dyed some seam binding ribbon using Mint Macaron and Powder Pink reinkers. As I began layering all the pieces together I felt something was missing and decided it needed a sentiment, but I was stuck on where and what. As I looked over some of my sentiment sets, I came across the new bundle, Tabs for Everything, and knew just what I needed! Using the coordinating punch, I punched a tab out of Lemon Lime Twist card stock. Next, I stamped “hello you” on a piece of Whisper White card stock and punched it out using a hole punch. I stamped the scalloped frame from the stamp set onto the tab and mounted the circle using a mini glue dot. I tucked this between the tulip panel and the Powder Pink matte. I think it pulls the card together nicely!
For my second card I wanted to use another marbled background I’d created using Pacific Point so I turned to the Birthday Delivery bundle since Pacific Point is one of the coordinating colors for this suite. I love giving special birthday cards to friends and I knew this would be the perfect card for a friend who loves foxes. I was very excited when I realized that in addition to matching the stamps, the dies cut elements from the coordinating DSP. I also like that there are stamps curved to fit inside the flag banner that the fox holds. There are a bunch of amazing embellishments in this suite, including pop-up honeycomb balloons. I knew the card needed one of these inside and that is how the poodle (I call her Lola) came to be hanging out inside!


I began with an Old Olive A2 card base and I stamped the present randomly in Old Olive in for a tone-on-tone effect. I die cut the fox and banner from the DSP and also cut the following strips: striped DSP (1 1/4″ x 4 1/4″), Pacific Point marbled card stock (1″ x 4 1/4″), and Pacific Point card stock (3/4″ x 4 1/4″) onto which I stamped the sentiment, “Let’s Celebrate Your Day,” and layered all three pieces together with snail. Using the dies, I cut Lola and two balloons from the DSP and stamped the balloon strings on the left inside panel, positioning them so they looked like she had them in her mouth. The honeycomb balloon has adhesive, making placement a breeze! HINT: For perfect honeycomb placement, place it last and follow these steps: expose one side of the adhesive and place it flush with your center score line then you can expose the left side and simply close the card for the proper placement every time! I finished it off with the “SURPRISE” sentiment and some thin strips of DSP.
Thanks for hanging out with me, and learning (or relearning) a fun innovation! Join me next month for another of my go to innovations, washi techniques. Until next time, remember, creativity and imperfection live together in all we do. “Grace is the face love wears when it meets imperfection.”
~xoxo

Supplies Used:
Full Wide Stamp Case (127551) & Half Wide Stamp Case (127552)
Reinker: Mint Macaron, Pacific Point, & Powder Pink
Card Stock: Mint Macaron, Powder Pink, Lemon Lime Twist, Old Olive, Pacific Point, & Whisper White
Birthday Memories DSP (144118), Balloon Honeycomb (144124), & Glass Marbles
Stamps & Dies: Tranquil Tulips (143767) & Card Front Builder (144674)
Bundles: Tabs for Everything (145364) & Birthday Delivery Bundle (145294)